Main analytics user: developer

- If you do not have an account, sign up in the analytics front-end to create a developer account with username, email and password, selecting Developer as role.
- With your account created, log in the analytics front-end.
- Once you are logged, in the developer homepage (Figure 1), you can create games by using the Create a new Game form, which needs a game name.
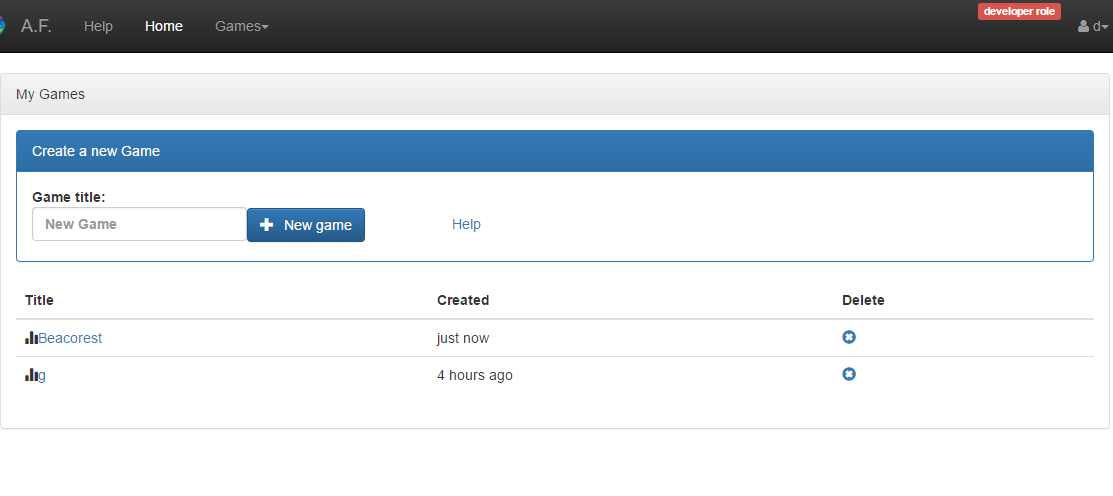
Figure 1.: Developer home page with form to create games.
- After creating a game, the game configuration page with information as the Tracking Code will be displayed (Figure 2).
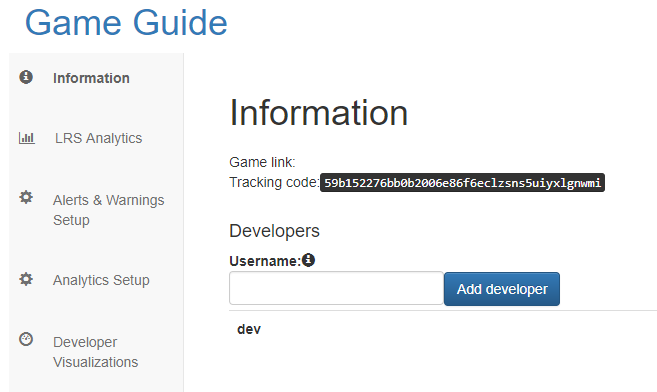
Figure 2.: Information about a game for developers including tracking code.
- In the information tab you have the Tracking Code and a small form to add more developers to your game, so they can manage the game too.
- The Alerts and Warnings setup has more specific configuration. Here you can set up certain assertions to trigger alerts or warnings when something happen. All the variables are analyzed for each player. For example:
- If you want to trigger a warning when one of your learners fails a Game (Figure 3), you have to add a warning like this:
( this.completed.level.MyGame.score < 0.5 )
Figure 3.: Warnings configuration requires a message and a condition.
- If you want to trigger a warning when something more complex happens, like, for example, a student that has failed more than the half of the alternatives (minimum 5 answers given), you have to add a warning like this:
( function(res){
    var incorrects = 0, corrects = 0;
    for(var i in res.selected.alternative){
        for(var j in res.selected.alternative[i]){
            if(j == "Incorrect")
                incorrects += res.selected.alternative[i][j];
            else
                corrects += res.selected.alternative[i][j];
        }
    }
    return (incorrects + corrects) > 5 && incorrects > corrects;
}(this) )- Also, in the Alerts and Warnings Setup, you have a check-box that allows you to set the game as public game (Figure 4), so the teachers can create activities for their classes using this game. If you do not active this option, the game will be only accessible to you as developer. Teachers will not be able to use it.
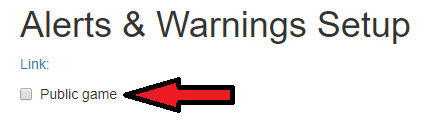
Figure 4.: Option to make the game public.
- Analytics setup tab (Figure 5) allows the developer to manage complex details about how the traces are going to be analyzed. As this is considered advanced configuration, we recommend you to read the Analysis Configuration wiki page.
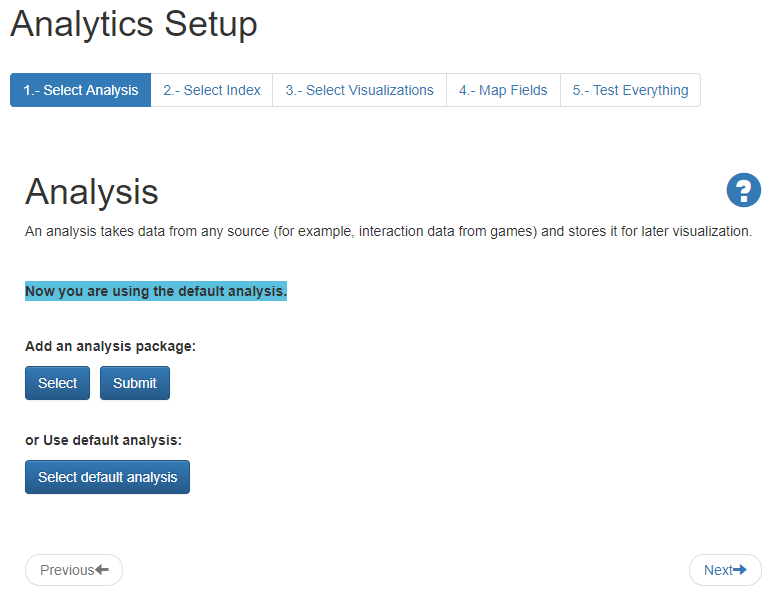
Figure 5.: Analytics setup page.
- Finally, you have the default visualizations for developers (Figure 6):

Figure 6.: Some of the default visualizations for developers.
APIs are available for creating a game and for creating a game version.
There are two possibilities:
- You can create only 1 game, and send all the traces to this game. The problem with this is that you have to make sure you tag every trace with an extension of, for example, which minigame has sent this trace. This way the Kibana dashboard will be a little bit of a mess unless you filter the traces.
- On the other hand, you can create a game for each game, and for each minigame. This way every dashboard will be useful by itself, with no need to filter:
- If you decide to do this, you have to provide each tracking code to each minigame.
- Remember also you have to create an activity for each minigame and class.