Welcome to the docs page for the MakeCode Cabinate Project (MCCP). Here I'll break down the process I've gone through to get this thing up and running so that (as Colin says) in case I get hit by a bus, ya'll will still know how this suff works.
- The Software
- The Hardware
- Issues
The OS of choice was RetroPie (an emulation centric OS for raspberry pi) It would have worked with other emulation OS such as Batocera or RecalBox but I just chose RetroPie since I have previous experience with it and know it works.
There was also the option to actually modify the firmware of the RPi itself to allow for instant transferring and running of games like the MeowBits but unfortunately this isn't natively supported for the 3b+ and would probably require modification of the firmware which is something I'm not very confident with. Also, using an acutal emulation OS just allows for more possibilities of expansion in future, If say we want to run games other than MakeCode on this thing
So the first port of call was to flash the RetroPie OS to the Raspberry Pi using the RPi Imager Tool available on their website. The imager tool is kind enough to include RetroPie in its library of OS' so no need to go downloading the image manually

Once the image had finished flashing the SD was plugged back into the RPi and BOOM, EmulationStation. There was still some setup needed to allow for MakeCode games to run however.
McAirpos is an open source solution made by Vegz78 for running MakeCode Games natively on emulation OS' like RetroPie. It also works on both RecalBox and Batocera. You can set up the repository manually but this requires you to make some modifications to the theme files as the manual setup on the GitHub README.md only shows what to do for the "Carbon" theme (The default theme is now "Carbon-2021" as of 17/11/2020). Thankfully there is an auto setup script in the repository. Here's how to install McAirpos
Simply clone the repository1
pi@retropie: git clone https://github.com/Vegz78/McAirpos.gitAnd then run the install.sh now located in ~/McAirpos2
pi@retropie: cd ~/McAirpos
pi@retropie: sudo ./install.sh
There should now be a folder in ~/RetroPie/roms called makecode, we need to make this folder read/writable2
pi@retropie: sudo chmod 755 ~/RetroPie/roms/makecodeNow McAirpos was set up and showing in the menu but there was still some setup needed to be done in order to get it working properly.
MakeCode games normally download in a format called uf2 which is a file format specifically designed by Microsoft for flashing files to microcontrollers via USB (hence the name USB Flashing Format). This file format unfortunately doesn't work with McAirpos3 but (not so unfortunately) the MakeCode Arcade allows for exporting in other formats, such as .elf which is what we're using for this project. Thankfully, it's fairly easy to allow for exporting as a .elf file.
Change the url of the makecode arcade slightly so that instead of
https://arcade.makecode.com/#editor
it will now read
https://arcade.makecode.com/?nolocalhost=1&compile=rawELF&hw=rpi#editor
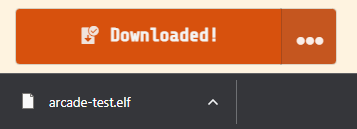
Now when you hit that lovely download button it will spit out a yummy .elf file instead of a uf2!
Transferring a game from a computer to the RPi is quite an involved process at the moment but I'll write an automation script at some point so that we don't have to do a bunch of command line crap.4 Anyway, just now, this is how it's done.
- Transfer the game from the computer onto a USB stick of your choice
- Plug the USB into the RPi
- Exit EmulationStation if you haven't already (Go to the RetroPie configuration menu and select raspi-config. Press Ctrl + Alt + F2 to take you to a cmd interface)
- Type
lsblkto list all the drives currently attatched (The usb will be some variation on "sda", sometimes with a number after it) - If not already mounted (you can see if it's mounted by looking at the "mount" column of the lsblk output), mount the drive
- Create a mount point
mkdir ~/mount - mount the drive at this mount point
mount /dev/sda ~/mount
- Copy the game file to makecode roms folder
cp ~/mount/[filename].elf ~/RetroPie/roms/makecode - Make the game file executable
sudo chmod +x ~/RetroPie/roms/[filename].elf
Now the game shows up in the MakeCode sub-menu of EmulationStation if we reboot but you'll notice that it still doesn't boot up properly :/ This is because we need to add it to the gamelist.xml file which is empty by default (don't know if this is a bug or not).
This is the template for adding a game to the gamelist.xml file (make sure to put this inside of the <gameList> tags)
<game>
  <path>/path/to/game/file</path>
  <name>Name of game</name>
</game>
Now the game will actually boot up (Hurrah!). But it's not over yet (Aw). The game was (kind of) visible but the display was skewed into oblivion. Luckily, this was an easy fix.
What's happening here is that all MakeCode games expect the display that they're running on to be in a 4:3 aspect ratio so when that doesn't happen it obviously confuses the game. So all we have to do is change the display resolution to something that's 4:3 and we're golden. And for good mesasure, I also changed the framebuffer width and height in the /boot/config.txt file to be 640 and 480 respectively.
Now we have a fully working MakeCode game running on our RPi!
The button kit we've acquired uses a microcontroller that connects to the RPi via USB-B (ew)5 and conveniently collects all of the buttons to one device so that we don't have to do any editing to the uinput.cfg files (thanks EG Starts B)). Here's a pinout of what all the different ports on the board are for.
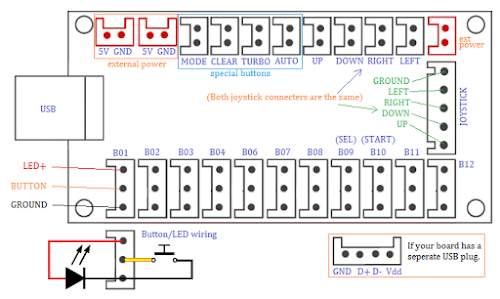
All we're really interested in is the 12 button slots and the 5-Pin joystick slot.
The joystick is very simple, just one ribbon cable that goes into both the stick and the board
The buttons however, are a little more ambiguous to wire. I only had this picture to go off of since the website with the user manual doesn't exist (:facepalm:)
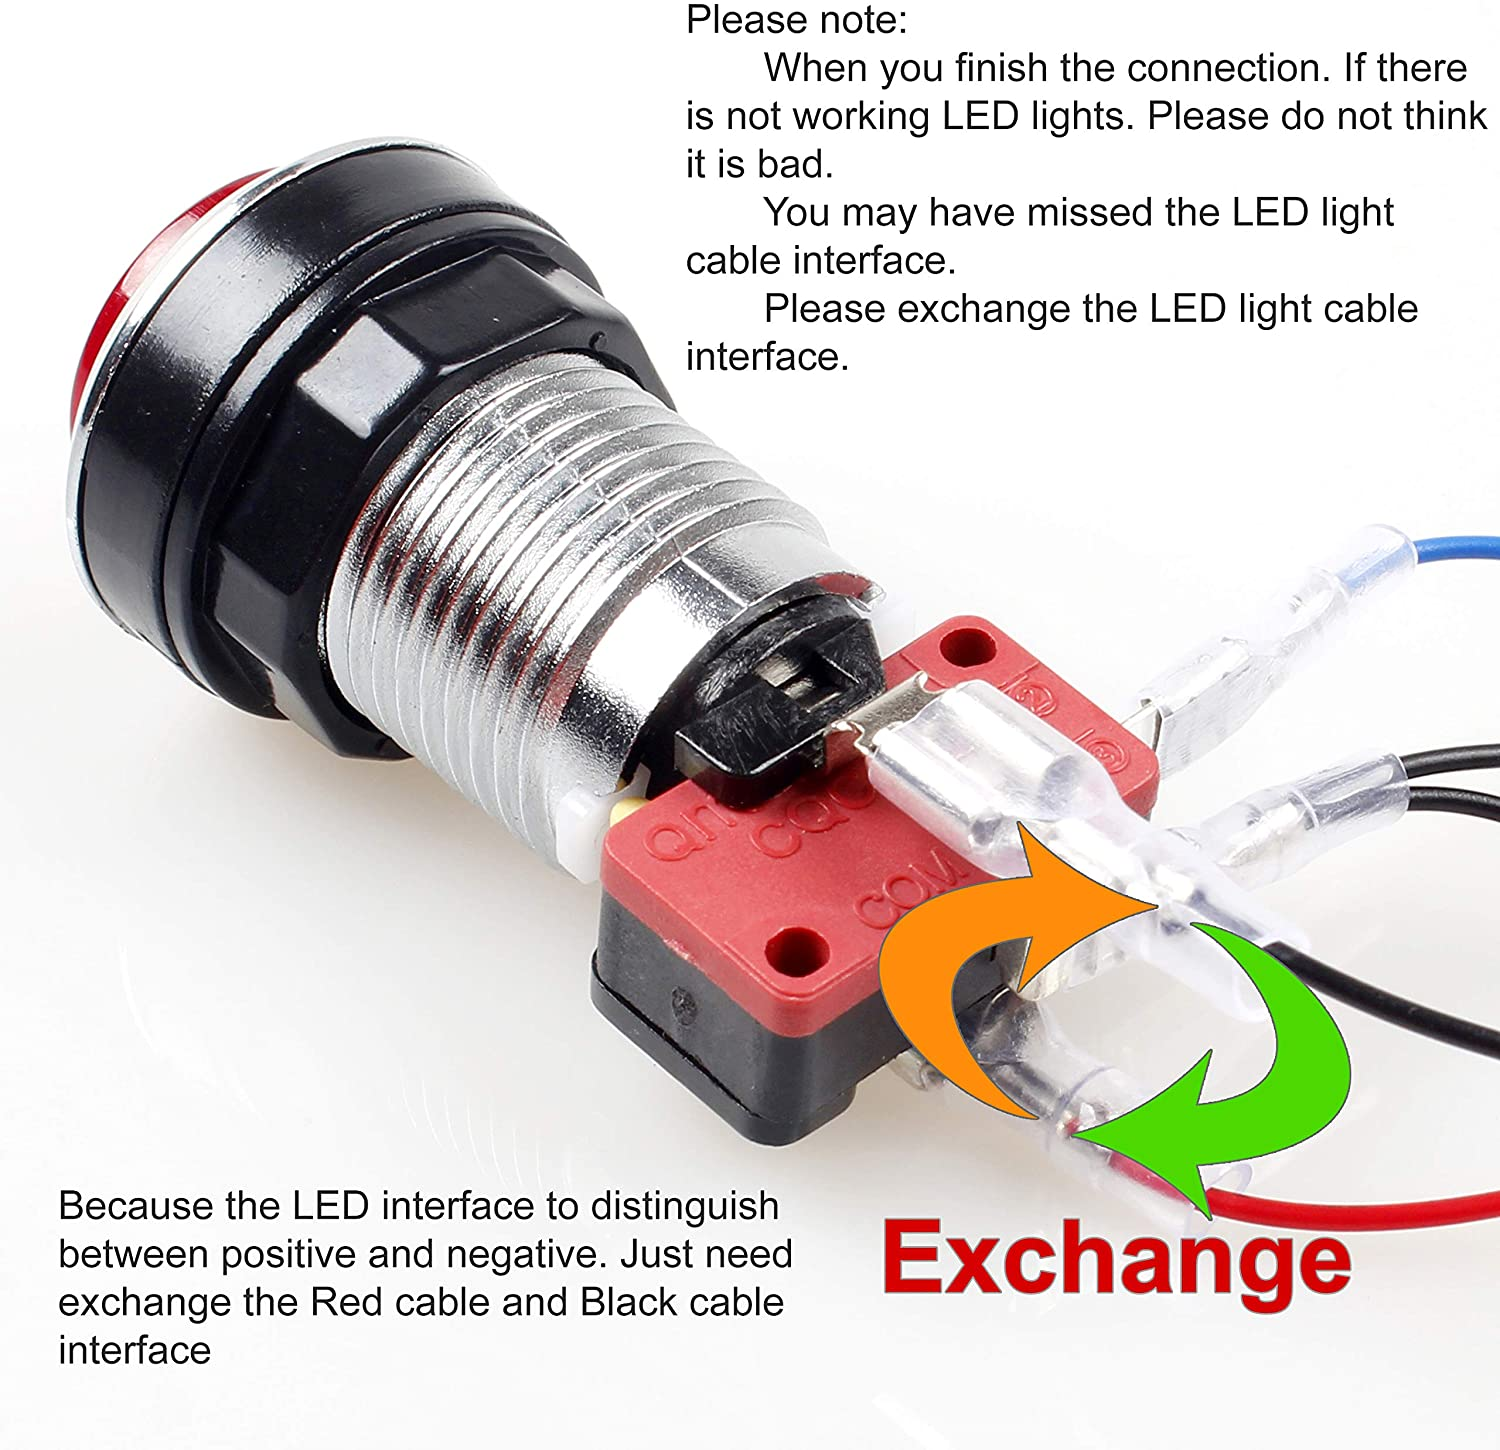
And even this wasn't completely accurate. Anyway, here's a picture of a button fully wired up
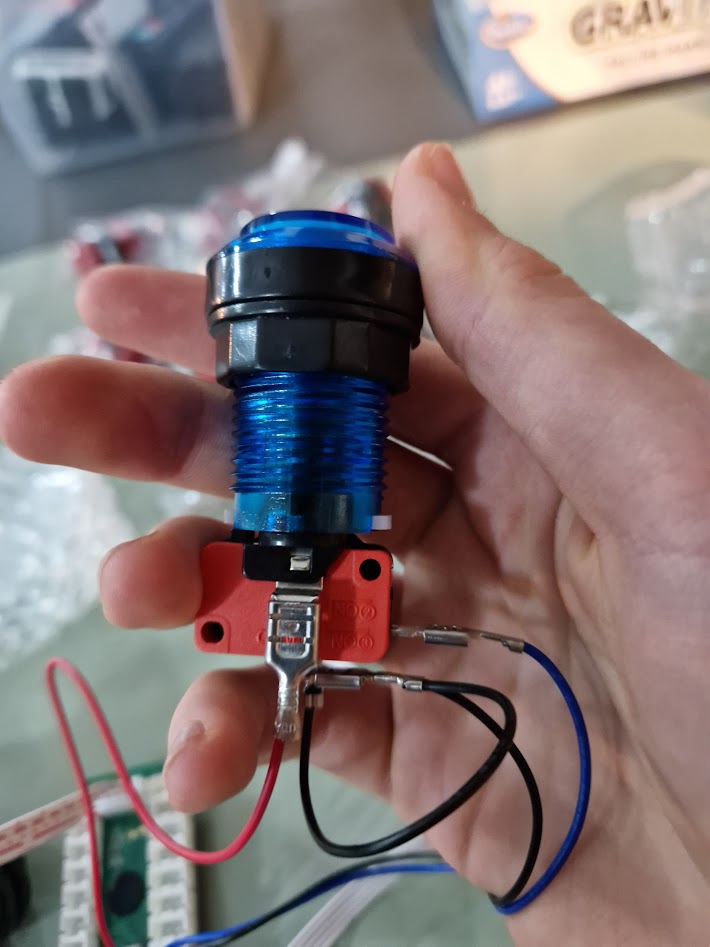
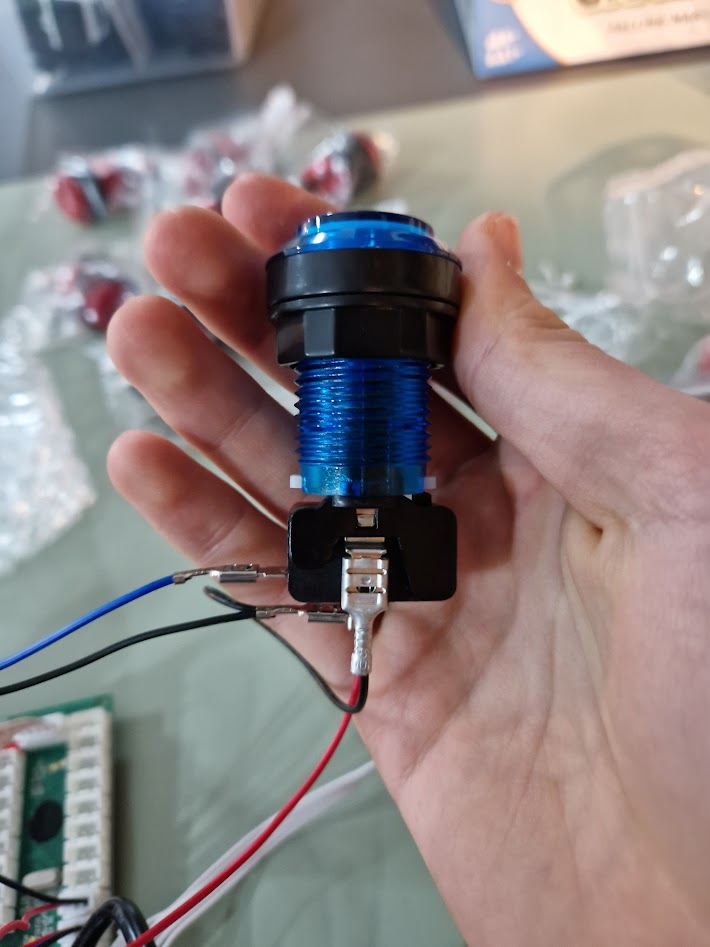
(The connectors are curled on one side, make sure the curled side is always facing down or towards the button)
There appears to be an issue with WiFi connection. first of all, the actual connection to WiFi has to be done by entering the SSID of the router manually as there doesn't seem to be an option to scan for WiFi (I may just be missing something) but when entered, the WiFi credentials don't work and the only way to get a network connection just now is via Ethernet. And we will need an internet connection if we want to use SAMBA. Any input on this issue would be appreciated
Thanks to Aidan (his spirit lives on) who has suggested, very cleverly, that we use the Network SMB protocol (also known as SAMBA) to transfer files and avoid USB shenanigans. The SMB protocol is as defined by Google.
A network file sharing protocol that allows applications on a computer
to read and write to files and to request services from server programs
in a computer network.
In laymans terms, SAMBA allows us to share files over a network, similar to that of FTP, SFTP, SCP and the likes.
This will allow us to add the RPi to the laptops as a network folder meaning that you will be able to simply drag and drop the game file into this folder and it will move to the RPi. This won't automatically add it to the gamelist.xml but it certainly makes things a lot easier.
THANKS AIDAN!
I have now uploaded two files, one called files.sh and the other called files.py both with full commentary. These files will be used to detect changes in the makecode game directory and update the gamelist.xml file accordingly. The files.py works by checking the file with the newest timestamp and getting the name of that file. It then fills that data into a template xml file and appends that to the original.
The files.sh simply scans for changes in the game directory and runs the python file when it detects one.