Welcome to my Project CleanBrowse, where I combine network-wide ad-blocking using Pi-hole on a Raspberry Pi 3B+ with uBlock Origin in Chrome for a truly seamless ad-free experience. This documentation will guide you through the setup and configuration from scratch, making it replicable for anyone looking to enhance privacy and enjoy cleaner browsing.
Project Name: CleanBrowse
Goal: Achieve a more private, ad-free network experience using Pi-hole and uBlock Origin.
Technologies: Pi-hole, Raspberry Pi OS (64-bit Lite), uBlock Origin, Chrome.

- Raspberry Pi: Model 3B+
- Storage: 16GB Samsung MicroSD card
- Power: Micro USB power supply
- Networking: Ethernet cable for stable connection
- Operating System: Raspberry Pi OS (64-bit Lite)

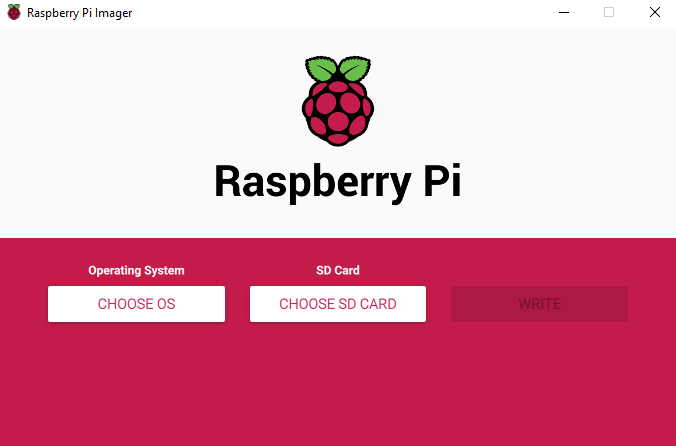
Download and Set Up Raspberry Pi Imager
- Download: Get the Raspberry Pi Imager for your OS.
- Insert MicroSD Card: Connect your 16GB Samsung MicroSD card to your computer.
- SSH: Turn on SSH via RPI-Imager or creating SSH file in bootfs of sdcard.

- Write OS: In Raspberry Pi Imager, choose Raspberry Pi OS Lite (64-bit) as the OS, select your MicroSD card, and click “Write.”

Insert Card and Power On Raspberry Pi
Once done, insert the MicroSD card into the Raspberry Pi, plug in the Ethernet cable, and power it on.
After booting, access the Raspberry Pi command line via SSH:
ssh pi@your_rpi_ip_addressUpdate System:
sudo apt update && sudo apt upgrade -y
-
Get the Installation Command: The command to install Pi-hole can be found on Pi-hole's GitHub.
-
Run Installation:
curl -sSL https://install.pi-hole.net | bash -
Setup Wizard:
- Choose Cloudflare as your upstream DNS provider (recommended).
- Follow other prompts as desired.
-
Save Access Info: Note down the admin URL and access password at the end of the setup.

Since I didn’t have access to my router’s admin panel, I used the following workaround:
- Open Wi-Fi Settings on Mobile Device:
- Manually Set DNS: In the DNS settings, input the Raspberry Pi’s IP (192.168.1.4).

To block ads on browsers, I added uBlock Origin in Chrome:
- Visit uBlock Origin on Chrome Web Store.
- Add Extension: Click Add to Chrome and confirm.

- Access Pi-hole Admin: Go to
http://<Your_Pi_IP>/adminfor stats and adjustments. - Filtering: You can add or remove domains directly from the Pi-hole dashboard.
For further privacy, consider adding browser extensions like Privacy Badger or HTTPS Everywhere.
By combining Pi-hole with uBlock Origin, Project CleanBrowse may not provides absolute privacy by blocking every ads but it will reduce upto 90% of ads with the help of custom adlists enhanced privacy and a smoother browsing experience. Feel free to reach out if you have questions, and enjoy an ad-free network!