Learn how to make a custom Gutenberg block from scratch!
This is a working WordPress plugin. You can activate it on your site and test it.
We made three versions of each chapter:
- Plain JS - No compilation needed and only using Gutenberg library.
- JS with HTM - No compilation needed but using HTM Library to write React template with string concatenation.
- JSX - need to compile using node packages.
This tutorial is sponsored by wpTips.dev - WordPress tutorials for developer.
The main difference is how you write the React template. Here's an overview of each:
Plain JS:
const el = window.wp.element.createElement;
const { RichText } = window.wp.blockEditor;

return (
  el(RichText, {
    tagName:"h2",
    value: atts.content,
  })
);
JS with HTM:
const html = window.htm.bind(window.wp.element.createElement);
const { RichText } = window.wp.blockEditor;

return html`
  <${RichText}
    tagName="h2"
    value=${atts.content}
  />
`;JSX:
import { RichText } from '@wordpress/block-editor';

return (
  <RichText
    tagName="h2"
    value={atts.content}
  />
);In my opinion, the choice is either HTM or JSX. Plain JS is a mess when you have lots of elements.
Here are the pros and cons of them:
HTM:
- (Pro) Easier to get started. Doesn't need to install any additional software.
- (Con) Harder to debug since the error console can't detect which line is problematic.
- (Con) Harder to find information online since most of them are using JSX.
JSX:
- (Pro) Simpler, cleaner, and lighter (minified) code.
- (Pro) Can support older browser after compiled.
- (Pro) More commonly used in Gutenberg community compared to ES5.
- (Con) Can take a while to setup, especially if you're not familiar with NPM.
In conclusion, it's about speed and scale of the project.
-
Download and Install NodeJS.
-
Open command prompt / terminal in this directory and run the command
npm install. -
During development, run the command
npm run devto automatically recompile everytime we save any changes. -
After finished developing, run the command
npm run buildto minimize the compiled code.
If you want to use HTM, don't forget to enqueue the library. You can find it in /dist/htm.js.
add_action('enqueue_block_editor_assets', 'my_enqueue_htm');

function my_enqueue_htm() {
  $dir = get_stylesheet_directory_uri();
  wp_enqueue_script('htm', $dir . '/js/htm.js', [] , null, true);
}
-
Tutorial 0 - JavaScript ES5 Syntax (Optional)
If you are not too familiar with the new JavaScript syntax, start here.
-
Tutorial 01 - Single Field
Create a block containing a single input field with rich formatting.
-
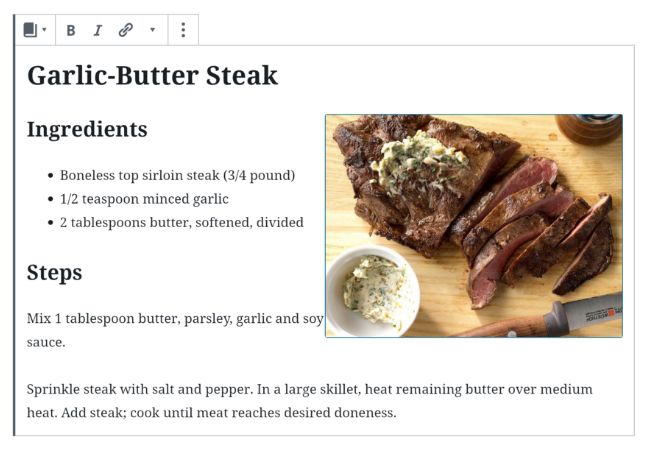
Tutorial 02 - Multiple Fields
Make a block for Cooking Recipe with 4 fields: Title, Image, Ingredients, and Steps.
-
Tutorial 03 - Custom Toolbar
Learn how to add custom buttons into the Toolbar.
-
Tutorial 04 - Custom Sidebar (Inspector)
Learn about adding field and buttons into the Sidebar.
-
Tutorial 04b - More Inspector Controls
Learn about various type of built-in controls:
-
Tutorial 05 - Nested Blocks
Create a block containing Heading, Paragraph, and Image blocks by default.
-
Tutorial 06 - Dynamic Block
Create a block to show latest X posts of selected category.
-
Tutorial 06b - Static to Dynamic
Transform the Cooking Recipe from Tutorial 02 into dynamic block.
-
Tutorial 07 - Link Popup
Create a Popup to add link
If you spot a mistake or want to request a topic, let me know in Issues
Learn more about Wordpress at our tutorial site: wpTips.dev