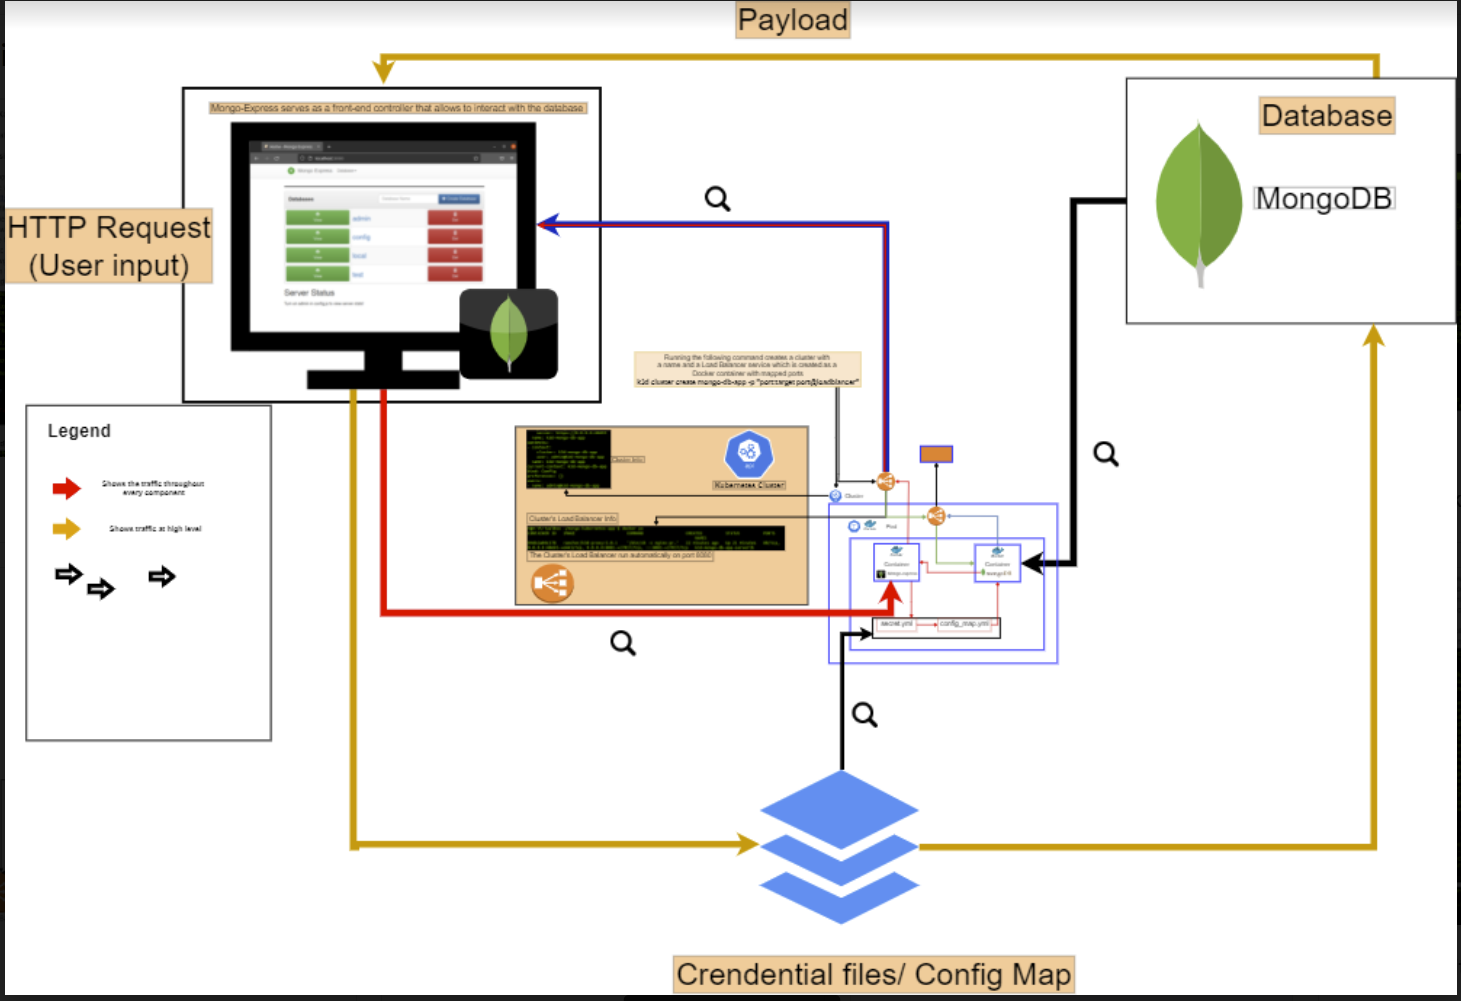
AIM: Deploy a MongoDB database by using kubernetes and docker on your local machine. Tools: Kubernetes: allows you to create a cluster that contains and controls docker containers Docker: it will allow you create containers that are specifically configured to run our applications and only contain the necessary resources. K3d: This tool allows you to run commands on kubernetes to create, and manage kubernetes resources . Kubectl: This tools allow us to interact with docker by creating, deleting and managing docker resources such as pods, containers, services and deployments.
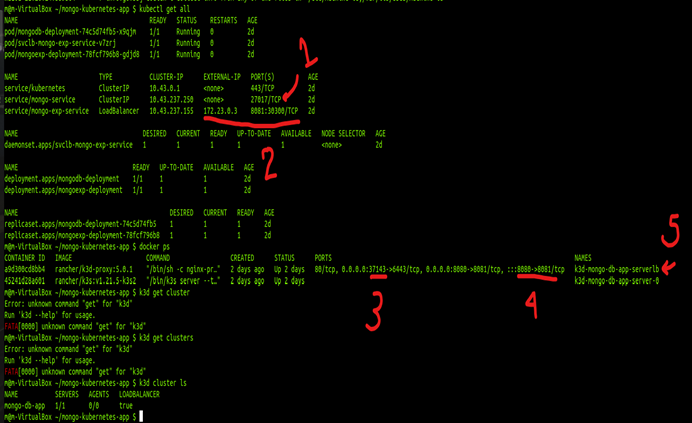
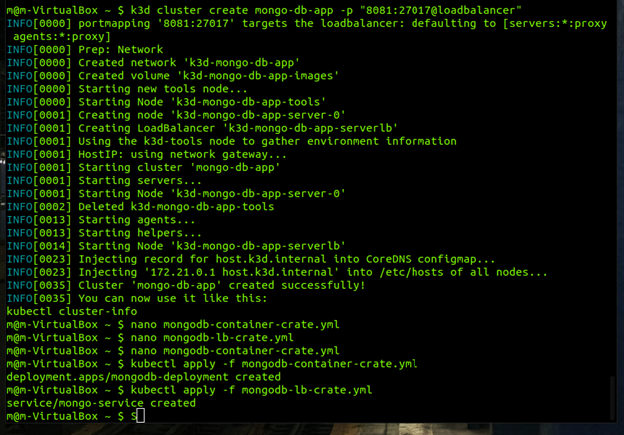
: create a cluster by using K3D Using the command: k3d cluster create name -p “port: (target-port)@loadbalancer” In my case I use the ports 8081: 27017 Once the process is done you will see that your cluster is available for use.
You can use the command: kubectl get all to verify the details and information of your cluster

Step 2: create the YML files necessary for each deployment, pod, and container YML files contain the information necessary to create our Kubernetes and Docker resources this is an example of a YML file. I gave my files descriptive names for more convenient use.
mongodb-container-create.yml
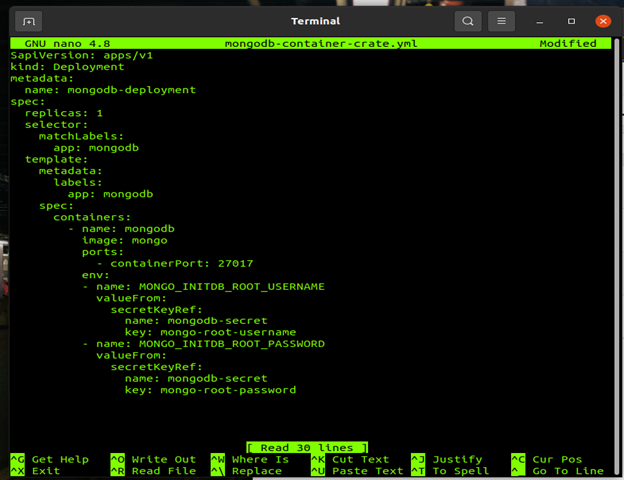
This Is the first YML contains information that we needed to make our docker pod and container
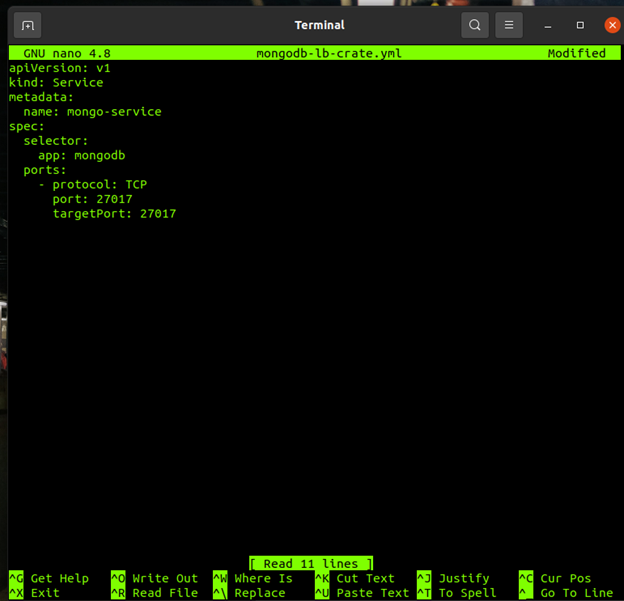
this is the second file that contains the information needed to create a service that will allow us to forward the port that is serving our application in the container so that I can be accessible from outside of the pod. The ports are 27017 in both cases.
mongodb-lb-create.yml
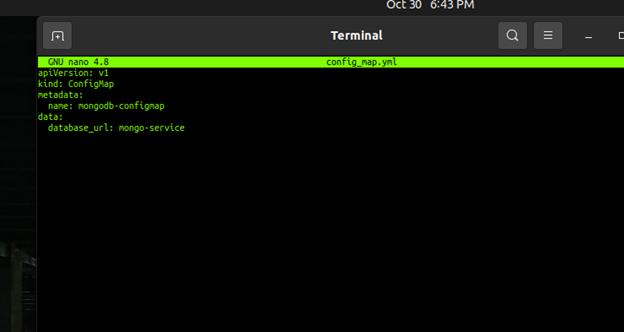
This is the third YML file it tells the front end part of our database where our actual database is located and this file is needed for security purposes.
config_map.yml
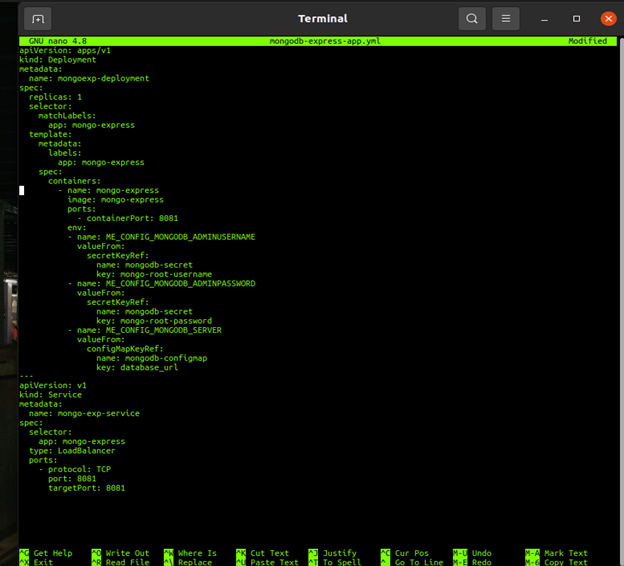
the 4th YML file creates the application container that allows us to interact with the database with an image container called Mongo-Express. I used the following script in YML file.
apiVersion: apps/v1 kind: Deployment metadata: name: mongoexp-deployment spec: replicas: 1 selector: matchLabels: app: mongo-express template: metadata: labels: app: mongo-express spec: containers: - name: mongo-express image: mongo-express ports: - containerPort: 8081 env: - name: ME_CONFIG_MONGODB_ADMINUSERNAME valueFrom: secretKeyRef: name: mongodb-secret key: mongo-root-username - name: ME_CONFIG_MONGODB_ADMINPASSWORD valueFrom: secretKeyRef: name: mongodb-secret key: mongo-root-password - name: ME_CONFIG_MONGODB_SERVER valueFrom: configMapKeyRef: name: mongodb-configmap key: database_url
apiVersion: v1 kind: Service metadata: name: mongo-exp-service spec: selector: app: mongo-express type: LoadBalancer ports: - protocol: TCP port: 8081 targetPort: 8081
mongodb-express-app.yml
The last part is to create a secret.yml file that will hold an encrypted version of our username and password in order to access the database. the frontend part of our database will use this secret file in order to access the database every time a change is made.
secret.yml
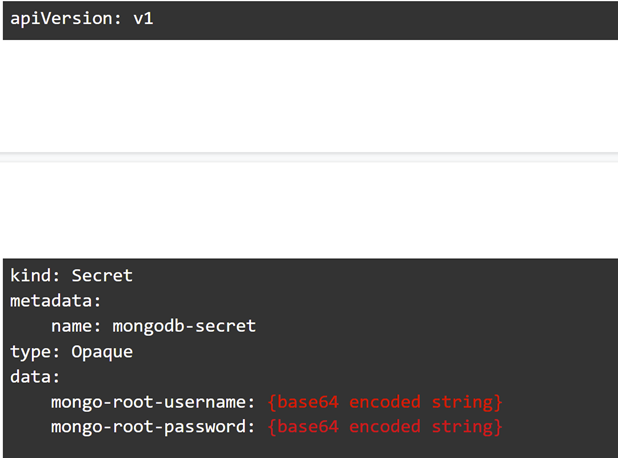
We can make our own base 64 encoded string by using the command: echo -n example_username | base64
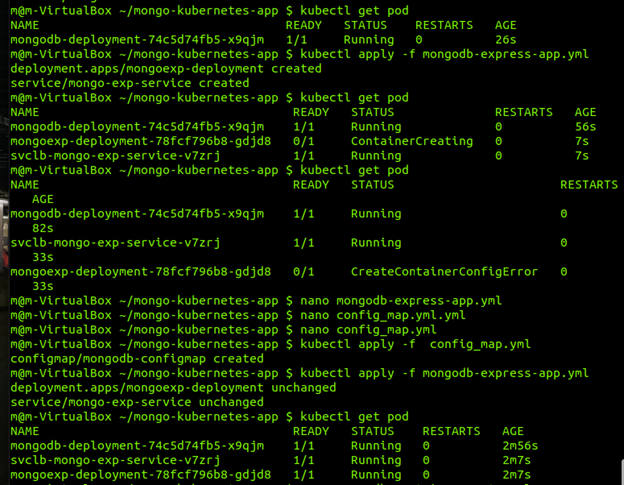
now that we have created the necessary files we can create the necessary resources by running the following command with each of our files
!!! An error that I run into was the order in which I created their resources This is why it is very important to around the files in the correct order. !!!
kubectl apply -f name_of_file.yml is the following order
- kubectl apply -f mongodb-container-create.yml
- kubectl apply -f mongodb-lb-create.yml
- kubectl apply -f secret.yml
- kubectl apply -f config.yml
- kubectl apply -f mongodb-express-create.yml
You can verify that the resources have been made and are running by running the command kubectl get pod or kubectl get all
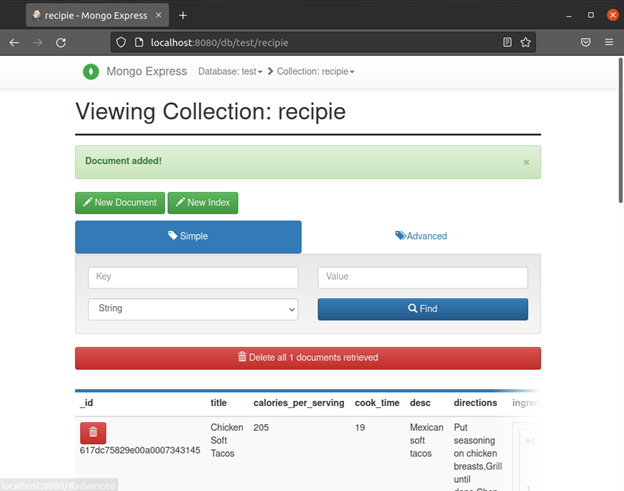
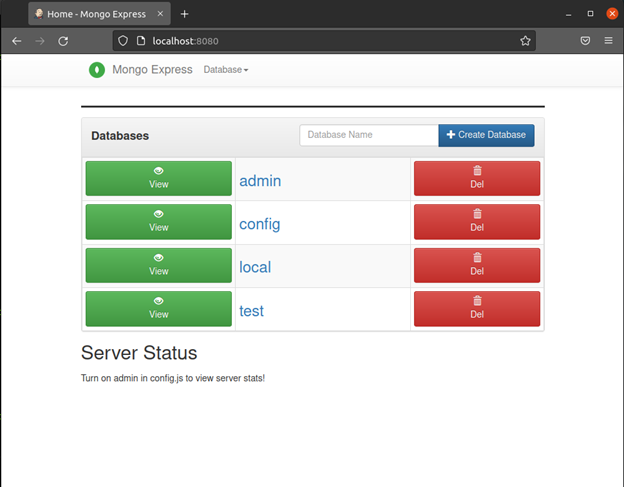
Once all the resources are running you can visit your clusters port in your browser via the localhost and we can see that our database is ready for use.
You can create a database by adding a name in the database name text field and clicking on the create database button.
After your database hasn't been created you can create a collection by adding a name the collection name text field and clicking on the create collection button. you can view the collection by clicking on the view button.
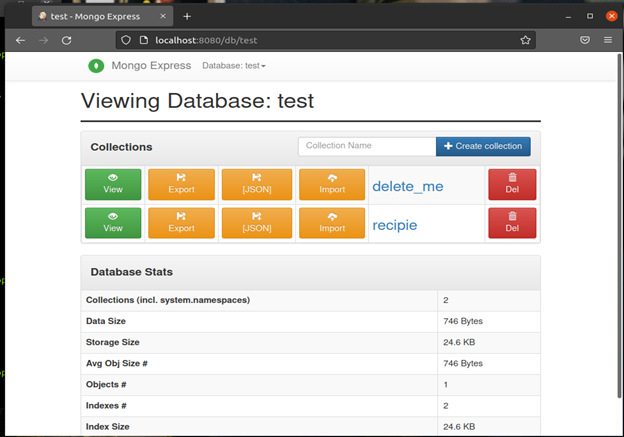
A new entry can be created by clicking on the new documents button and bring the desired data in each text field.