Guide to Github
This is a guide to help you get started in pulling down and making changes to the DomSim ink repo.
This guide assumes you are using Fork. You can do similar things with SourceTree, but the screenshots here won’t line up. The GitHub Client is quite a bit different, but should have the same terminology.
Once you have pulled the repo, you may want to know more about the /commands and [choices] available in Dom Sim. We have a DomSim Guide to Ink Script just for such an occasion.
If you haven’t already, create a GitHub account that you want to commit from.
Assuming you want to potentially submit changes to us, you’ll need to create a ‘fork’ of the DomSim ink repo. While logged into your GitHub account:
- Go to this web page: https://github.com/deviant-dev/dominatrix-simulator-ink
- Click the ‘Fork’ button in the upper right corner.
- You should now have your own version of the repo under your account name (replace with your account name):

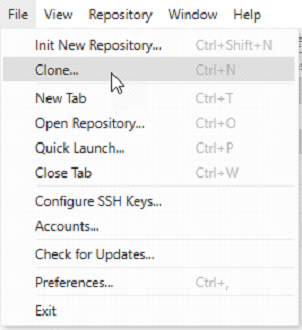
- In Fork, go to ‘File > Clone…’
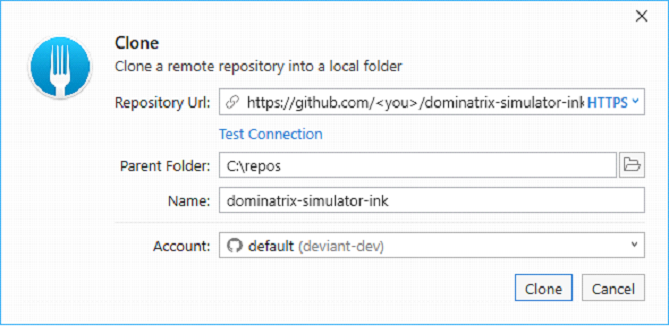
- Put in your forked URL and click ‘Test Connection’. If asked, let GitHub give Fork authorization to access your GitHub account.
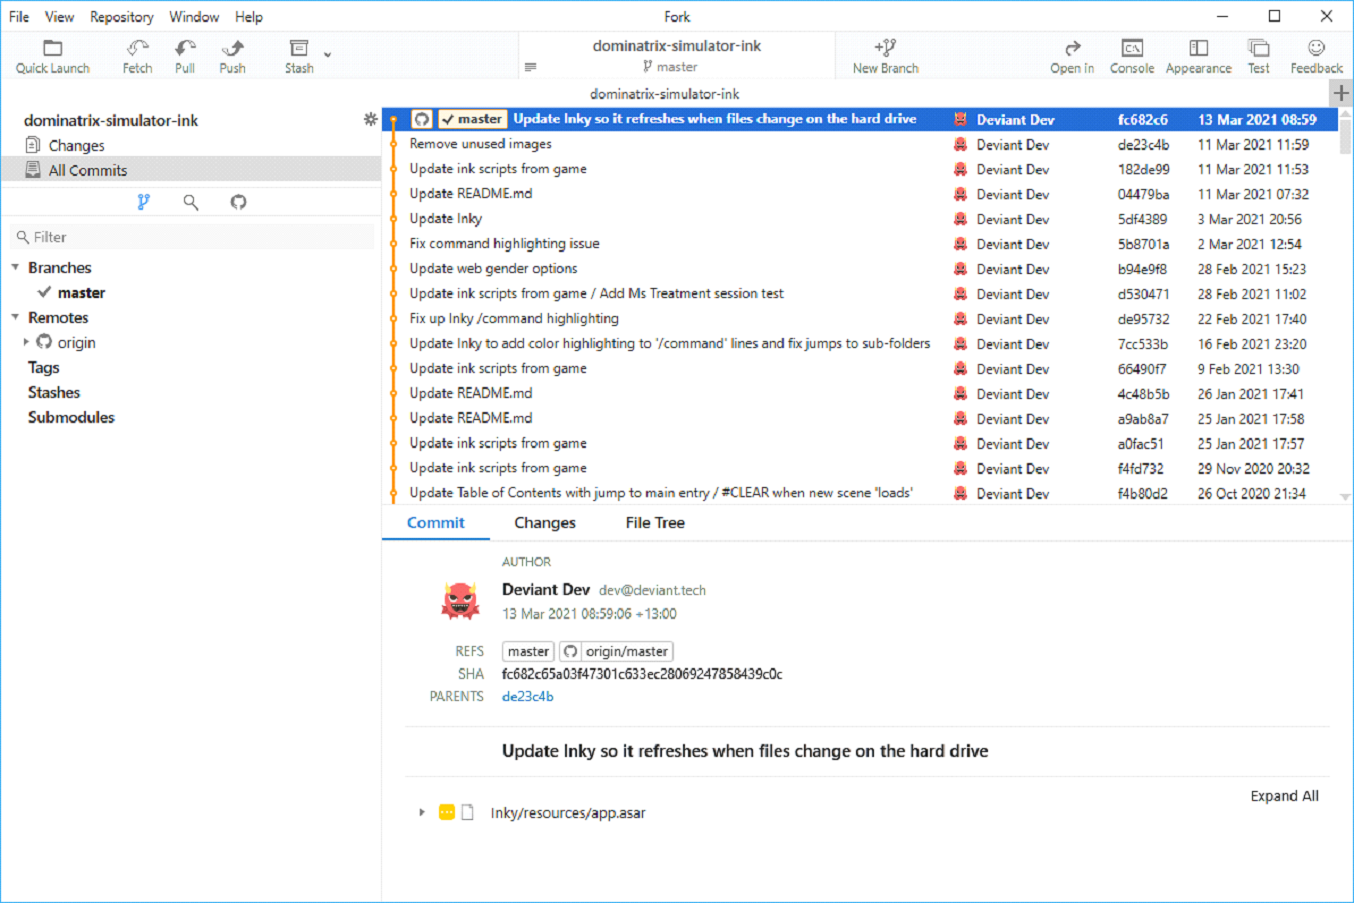
- Once it’s complete, you should be able to see all the commits in the client:
- Navigate to your new DomSim Ink files (it’ll be in the folder you specified in step 2 above)
- Open the /ink folder
- Double-click on the /ink/_web.ink file (or ‘Right-click Menu > Open with… > Choose another app’ if you’ve used a different Inky before).
- Expand ‘More Apps’ at the bottom of the suggested application list
- Locate the Inky.exe that came with your repo: /Inky/Inky.exe
As long as that Inky.exe is the default app for .ink files, you should be able to double-click on /ink/_web.ink from now on.
As you make changes, you’ll want to commit your changes. It’s best to do this from your own branch rather than the ‘master’ branch, so they’ll be ready to submit as a pull request.
First, you’ll need a branch to commit to.
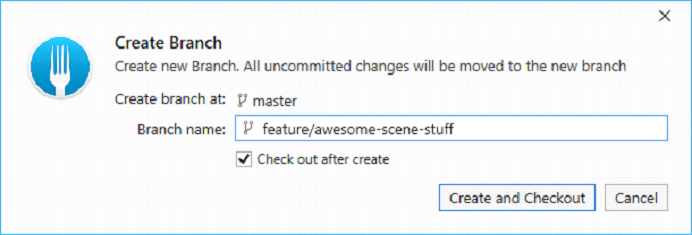
⦁ Create a new branch by clicking to ‘New Branch’ button along the top row.

⦁ Add in the name of your branch with ‘feature/’ or ‘fix/’ or ‘cleanup/’ as a prefix so it’ll be in a ‘folder’ and name it with dashes for spaces:
Once you have a branch and you’ve changed the ink files with Inky, you’ll want to commit them to the repo for safe keeping. Here’s how to make a commit:

- Click on ‘Changes’
- Select files you want to commit and select ‘Stage’ or just double-click them. (You can even select specific parts of files if you like.
- Add a comment that says what changed with optional extended description.
- Click the ‘Commit’ button in the lower right corner
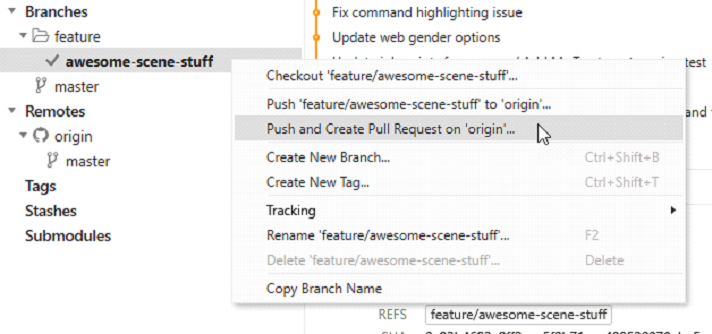
Once your changes are ready, you can create a pull request:
- Right-click on your branch and select ‘Push and Create Pull Request on ‘origin’...’
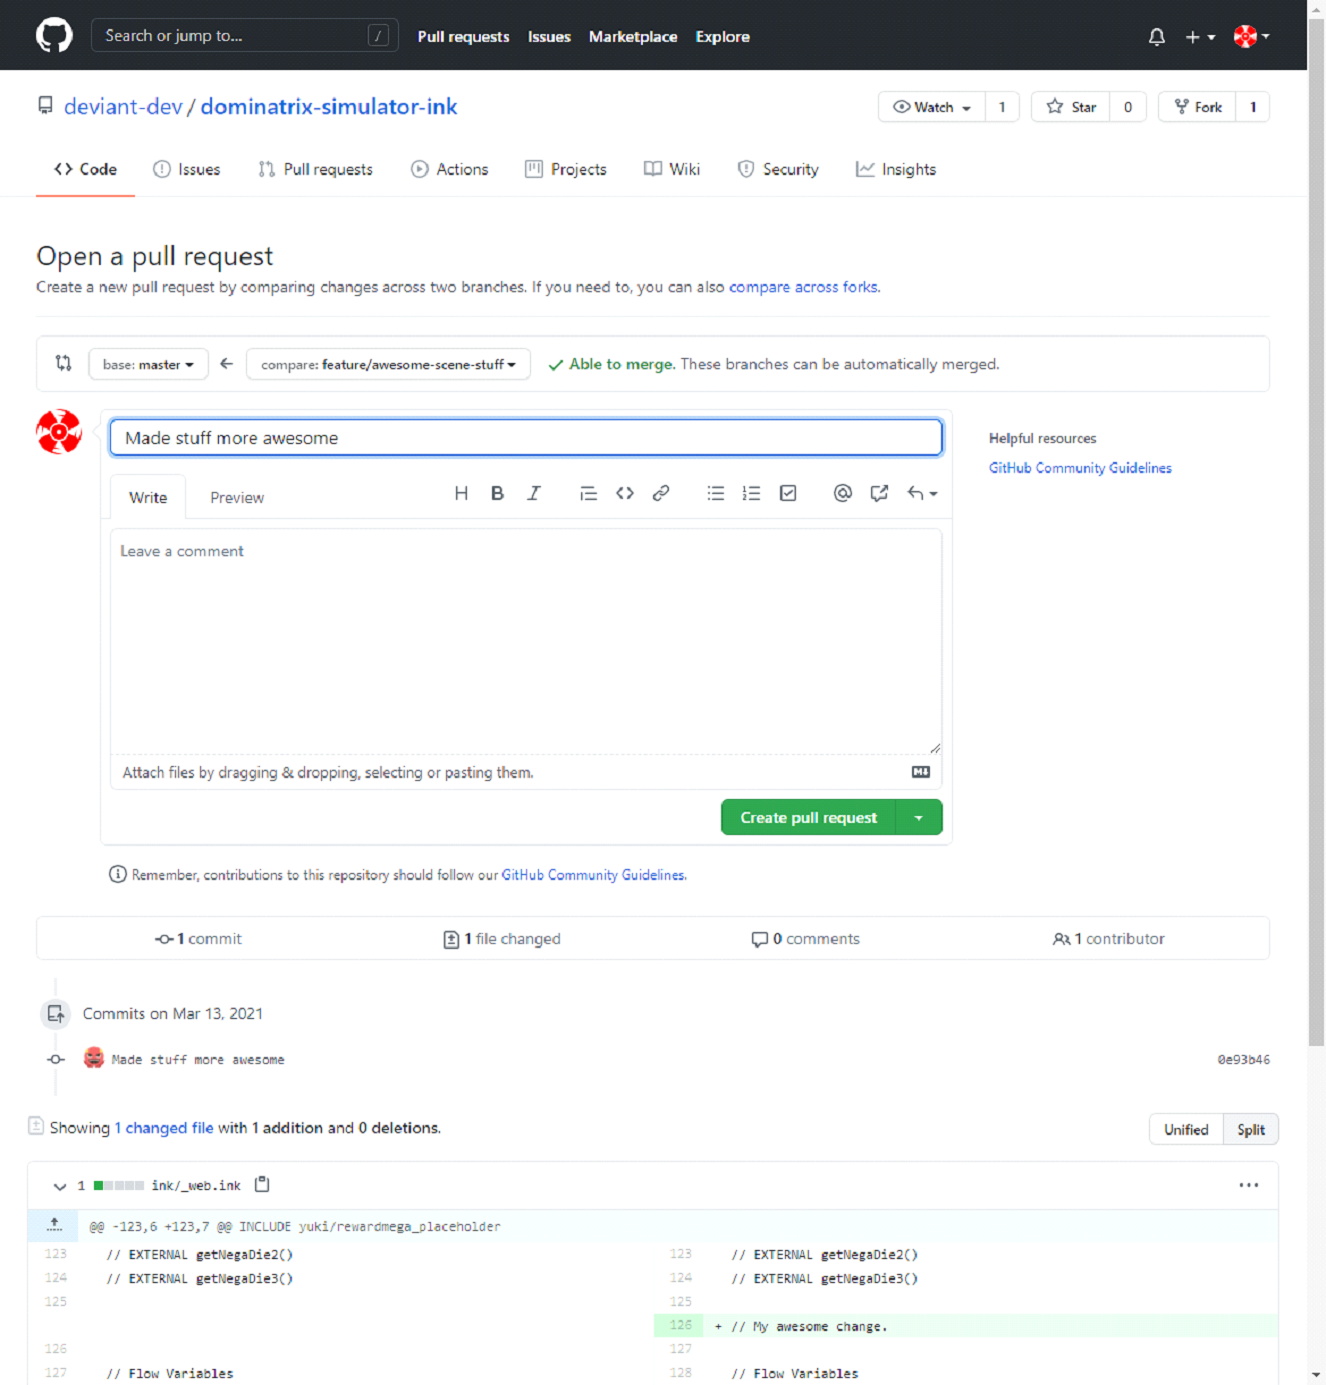
- Add any information that might help us understand the changes and click ‘Create pull request’
- Let us know on Discord that the pull request is there!
From there, we might post questions or have requests for changes before we accept the pull request. The discussion can happen on the Pull Request site. If there are changes to make, you can continue to commit changes and push them up to that branch and the changes will be added to the request. No need to make a new pull request.
Let us know if that works for you or if there are any problems!
-Created by Deviant Dev et al. -Edited by headphonetaco et al.