Local Button Control
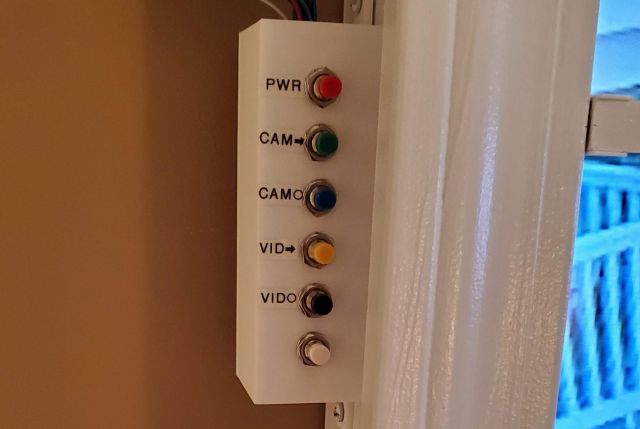
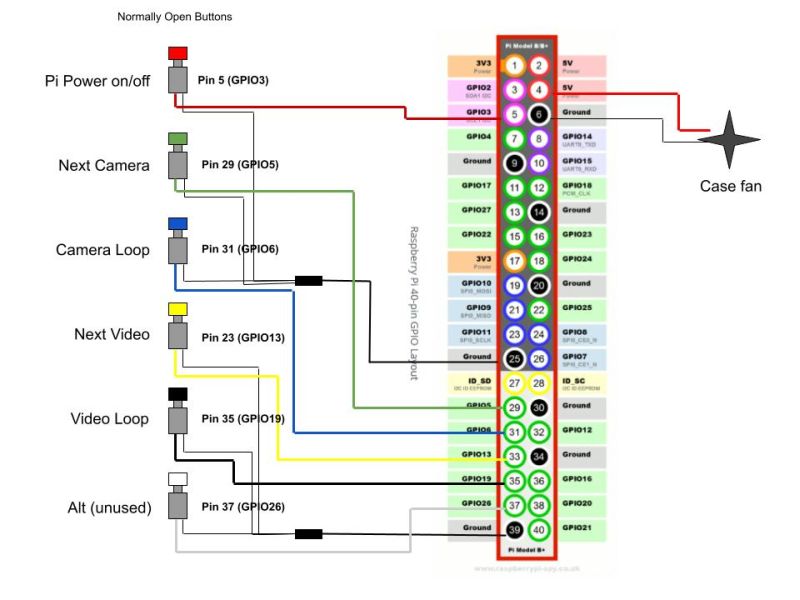
If you followed the build instructions for the virtual window at Resinchem Tech Blog, then you should have a control box with buttons connected to the Raspberry Pi. For reference, the default connections as defined in the Python application are as follows:
These buttons will perform the following actions (locally without MQTT or other external commands):
| Button | Pin/GPIO | Purpose or Command |
|---|---|---|
| Red | Pin 5 (GPIO3) | Safely powers down the Pi, or starts the Pi from powered down state |
| Green | Pin 29 (GPIO5) | Switched to next camera in list, or switches to camera mode if in video mode |
| Blue | Pin 31 (GPIO6) | Switches to camera loop mode, showing each camera for the length defined in options |
| Yellow | Pin 23 (GPIO13 | Switches to next video in list, or switches to video mode if in camera mode |
| Black | Pin 35 (GPIO19) | Switches to video loop mode, showing each video of the length defined in options |
| White | Pin 37 (GPIO26) | Unused. For future expansion or your individual use |
If your button configuration is different or you used different Pins/GPIO, you will need to modify the Python application to match your config. These are defined both within the button_press() function and at the top of the main() procedure.
If you do not have any local buttons, then MQTT commands will be the only way to control the display (or by modifying the Python application to add your own external control methods).