A Technion CS Software-Project "F1 Core Engine" for the Autonomous Formula-1 Technion Project
The data pipline from the car to the gui has 5 main parts:
- The Formula Automation Components
- Logger
- Backend Server
- Database
- Grafana
The formula dispatch server is composed of 3 main components. Each one serves as a Data Source: 1. Perception: Receives input from different cameras and sensors, and outputs absolute positions and information about the surroundings of the car. 2. State Estimation: Receives the output from the Perception Unit and creates a map of the state of the car. 3. Control: Receives the output of the State Estimation Unit and dictates behaviour of the car controls.
For the purposes of testing, the project also provides a random output generator which is meant to simulate each of the components.
The Logger receives output from the Formula Automation Components and sends them to the Backend Server. The Logger is also in charge of managing the connections and metadata about current experiments. It is represented as a class, each Formula Automation Component addresses the class and logs it's output using it.
The Backend Server communicates via gRPC with the Logger, it receives messages from it, processes them and inserts them into the Database tables. It is also in charge of managing open experiment sessions with the Logger.
This project uses TimeScaleDB which is an SQL-based database, This is since the data processed in this domain heavily relies on timing and TimeScaleDB is uniquely optimized for handling this type of data.
Grafana is a web-based interface for visualizing data. It is comprised of a server, and the client (a web browser running client-side javascript). The server has multiple dashboards, each functions as it's own page and each dashboard can have have multiple panels to display data streamed from the connected data sources. In this project, the grafana server is connected the TimeScaleDB database and displays live data & analytics about the car's behaviour.
- Git.
- Docker - For the purposes of reliability and reproducibility, the Backend Server, Database and Grafana Server are meant to be hosted on a docker - each of them as it's own docker image.
-
Clone this repository:
git clone https://github.com/ICST-Technion/F1CoreEngine.git -
Open docker desktop
-
To initialize the system run the following command within the project directory:
docker compose up -
To initialize the database run the following command within the project directory:
python3 server/db/init_db.py -i -
Login to grafana in
localhost:3000with the credentialsadmin:admin(and if you want you can change the password) -
Add a data source:
- Go to the
settings > datasourcesscreen: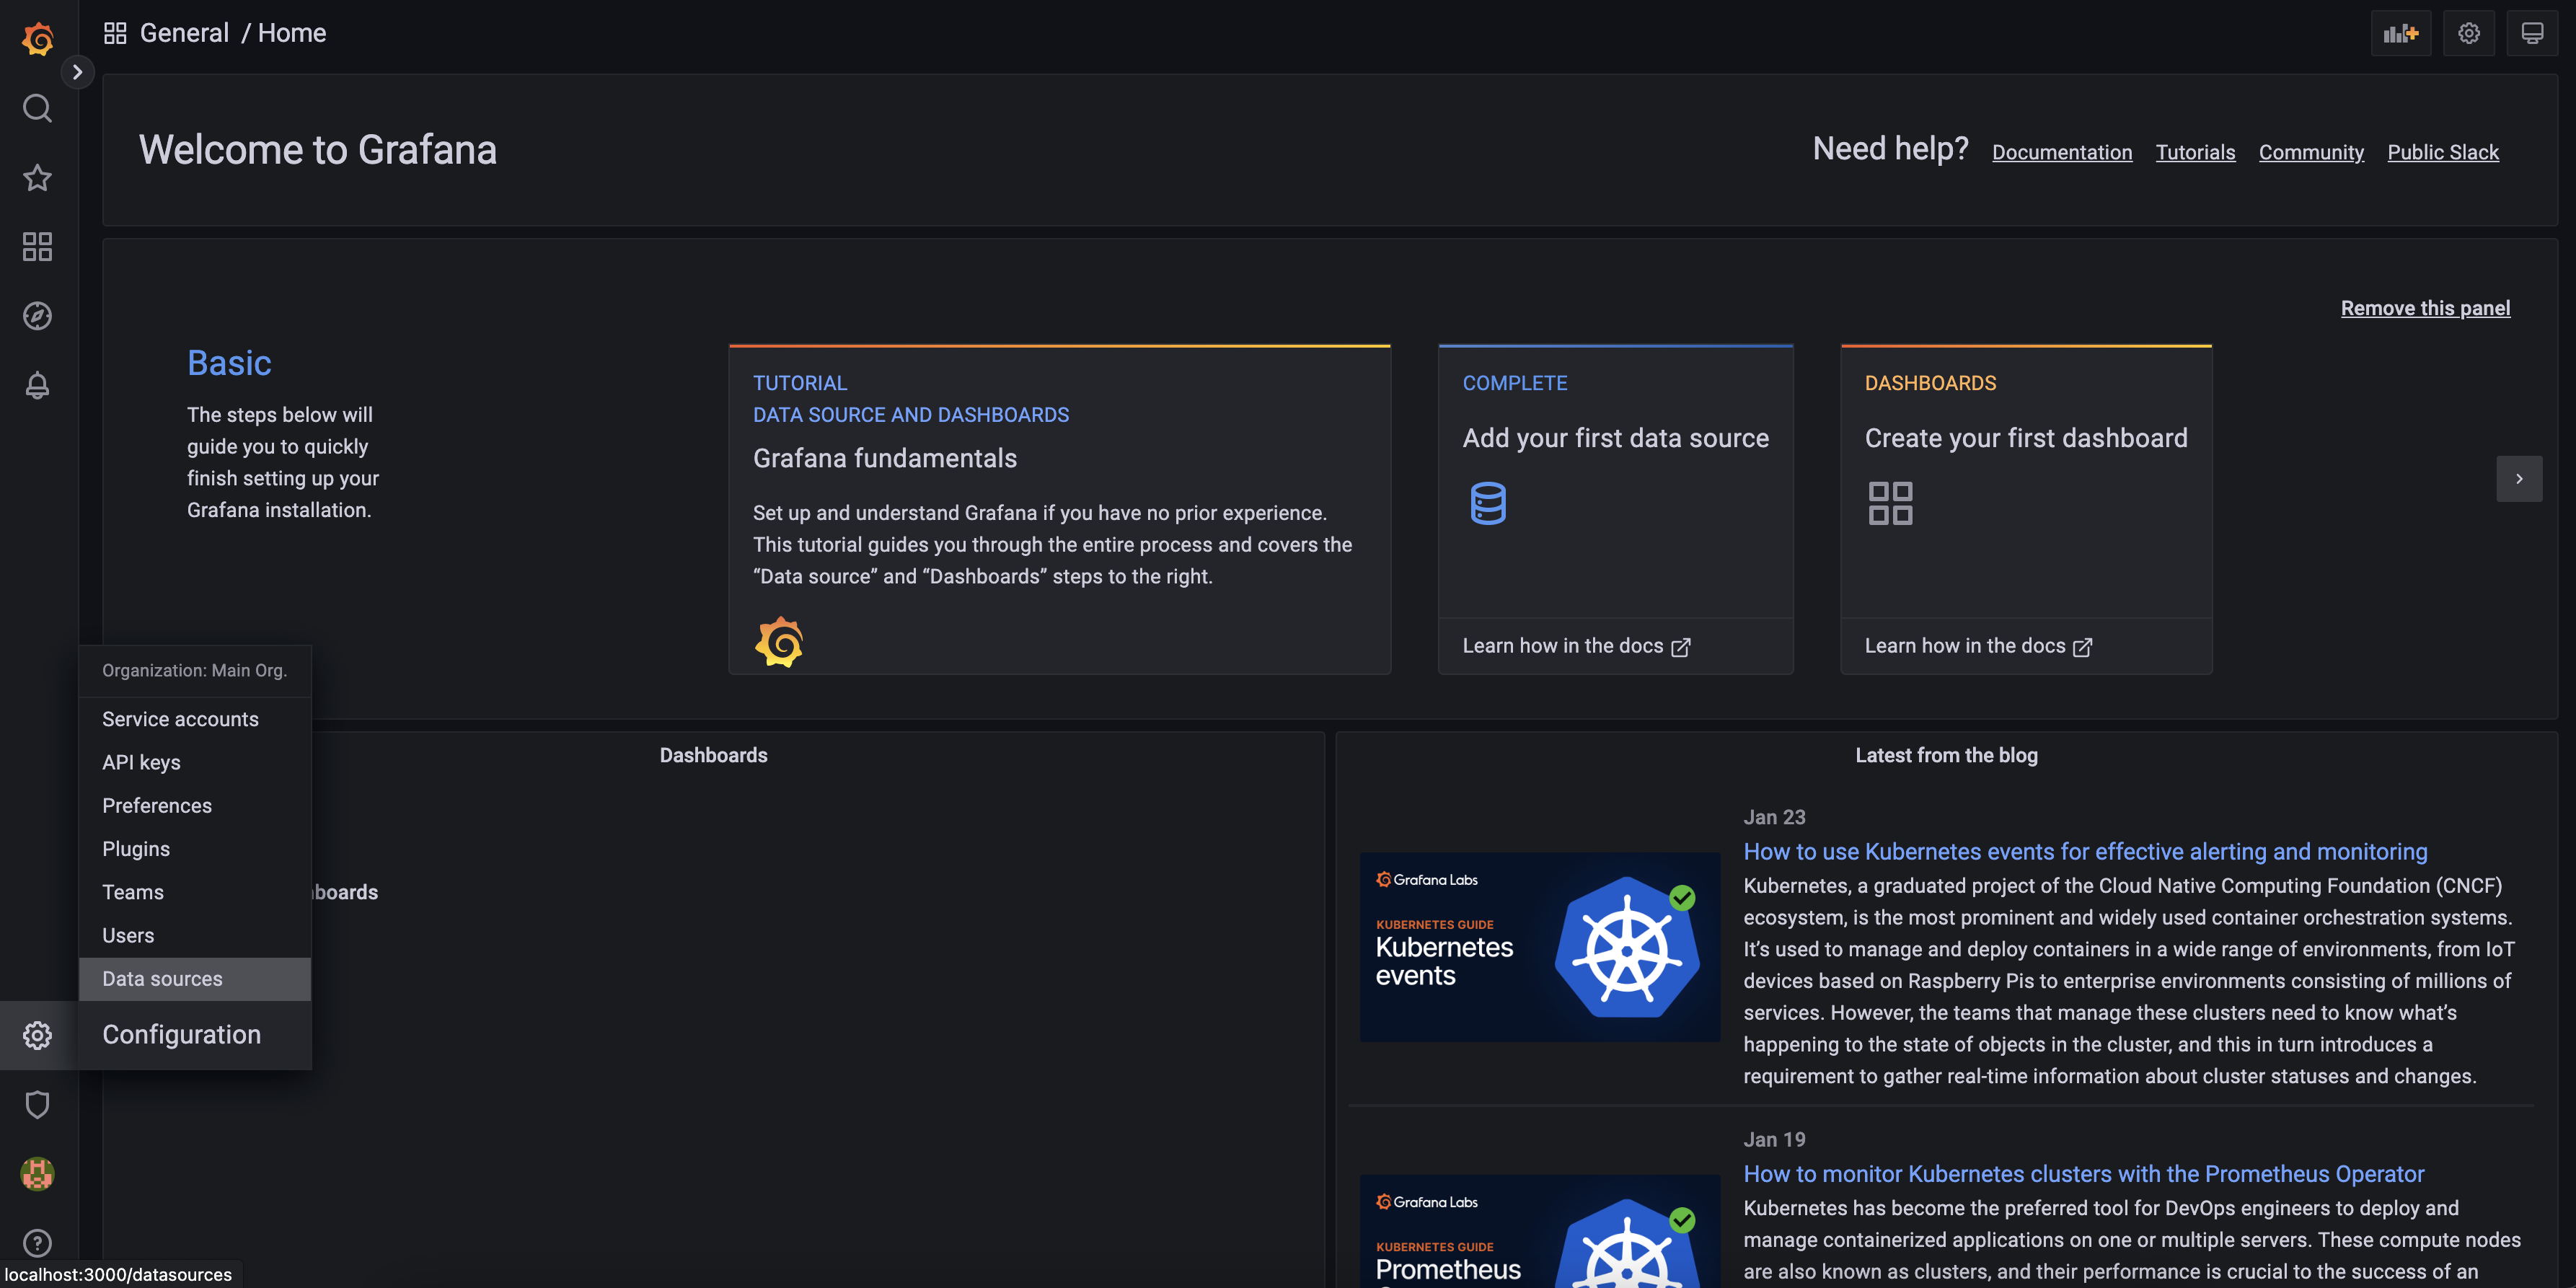
- Click
Add data sourcebutton. - Search
postgresin the search bar: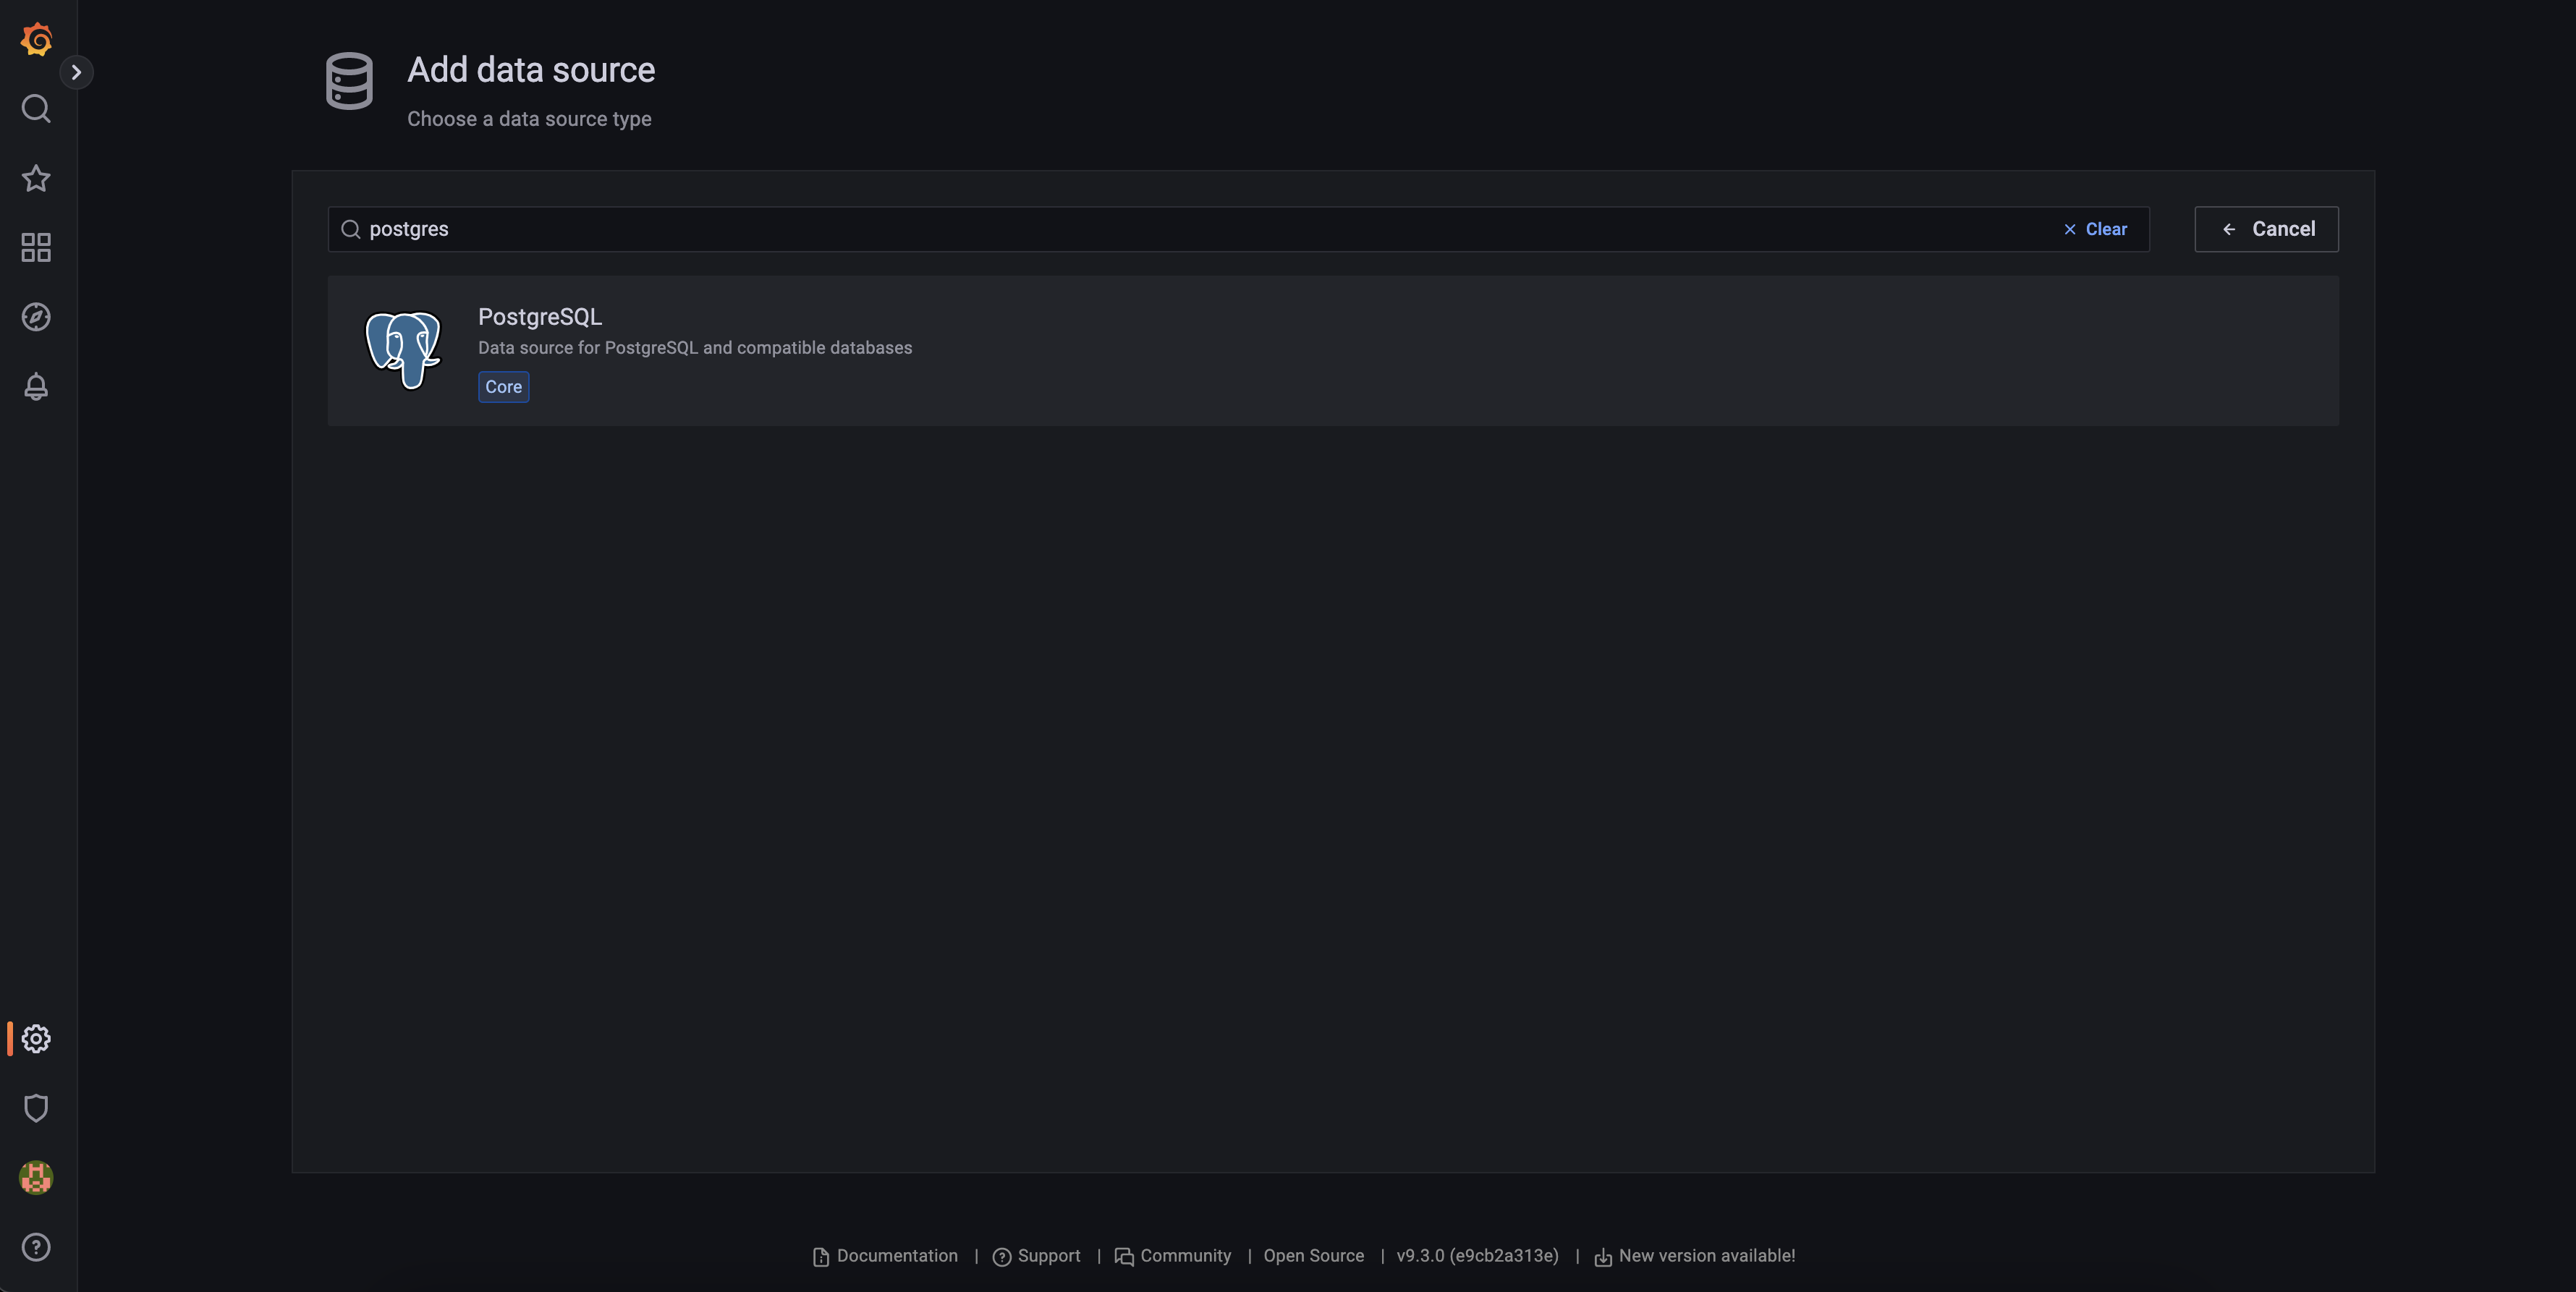
- Fill the information as shown:
- Host:
database:5432, Database:postgres, User:postgres, Password:password - Disable SSL
- Choose
PostgreSQLversion 15 and switch toTimescaleDB - Click
Save & Test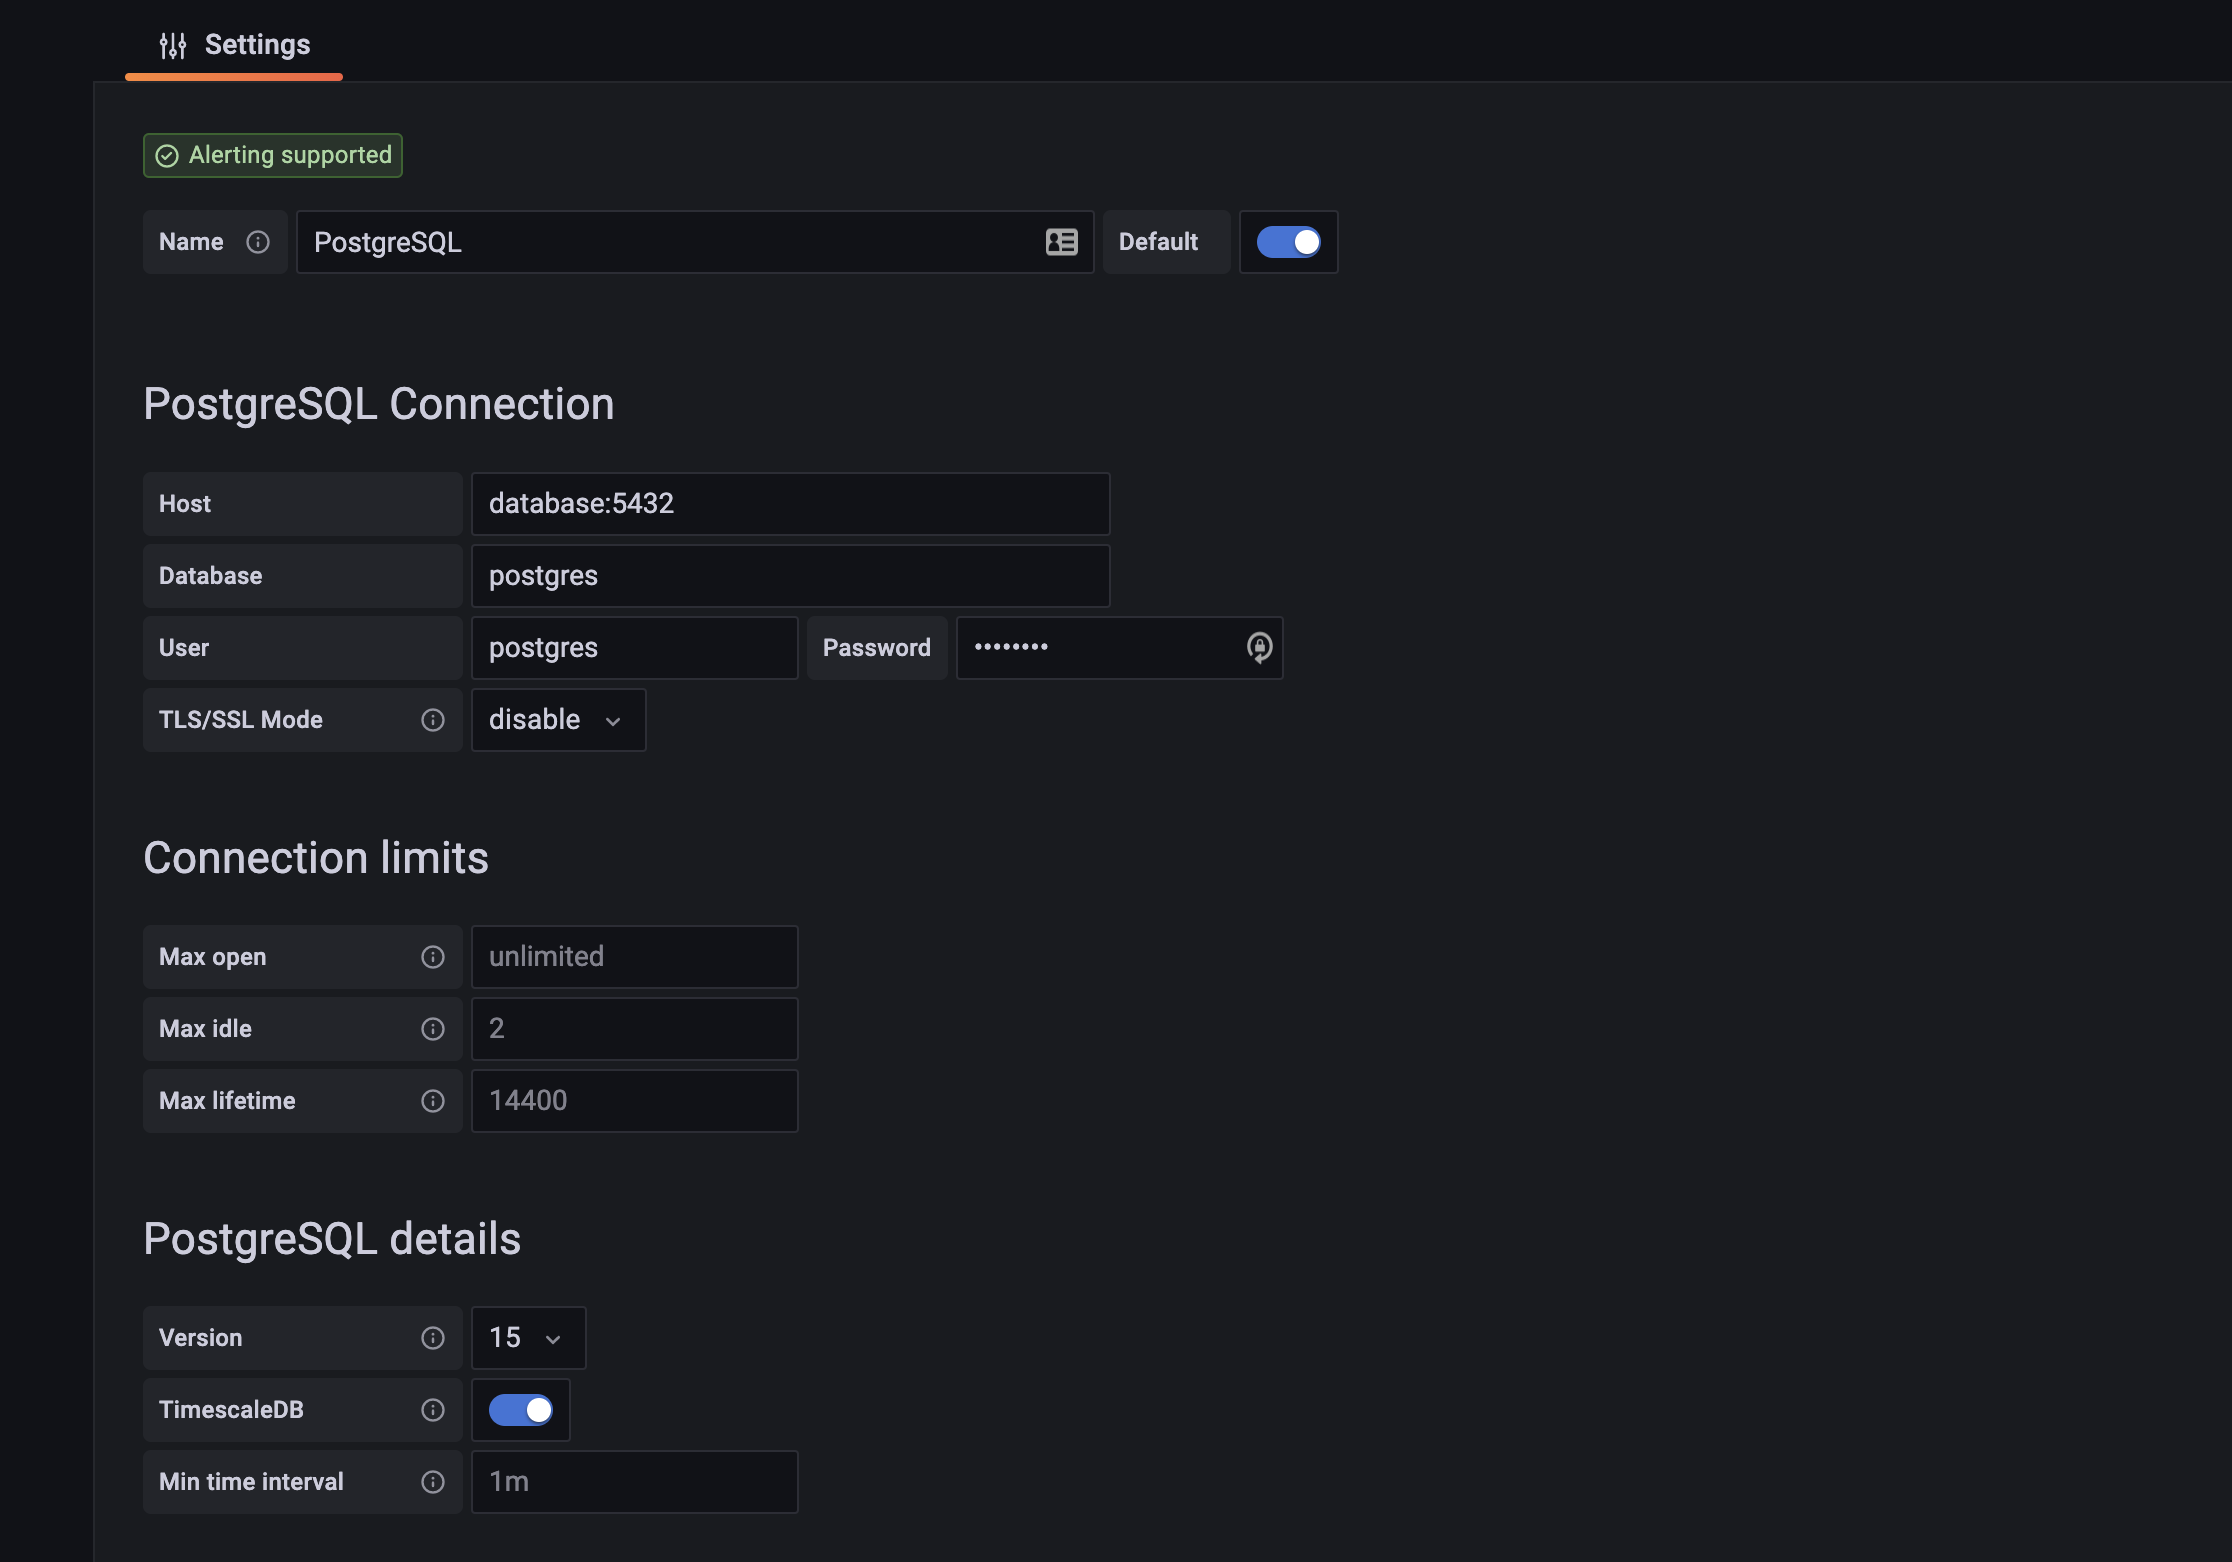
- Host:
- Go to the
-
Import a Dashboard as per the following instructions.
In this section we will go over how to reproduce the Grafana Server on new systems that have cloned this project. In the section we assume the following has already been done:
- This project's repository has been cloned on the local machine.
- An empty Grafana Server has been set up.
- Open the we browser of your choice.
- Insert the URL of the running Grafana Server.
- Login to the server with an admin account.
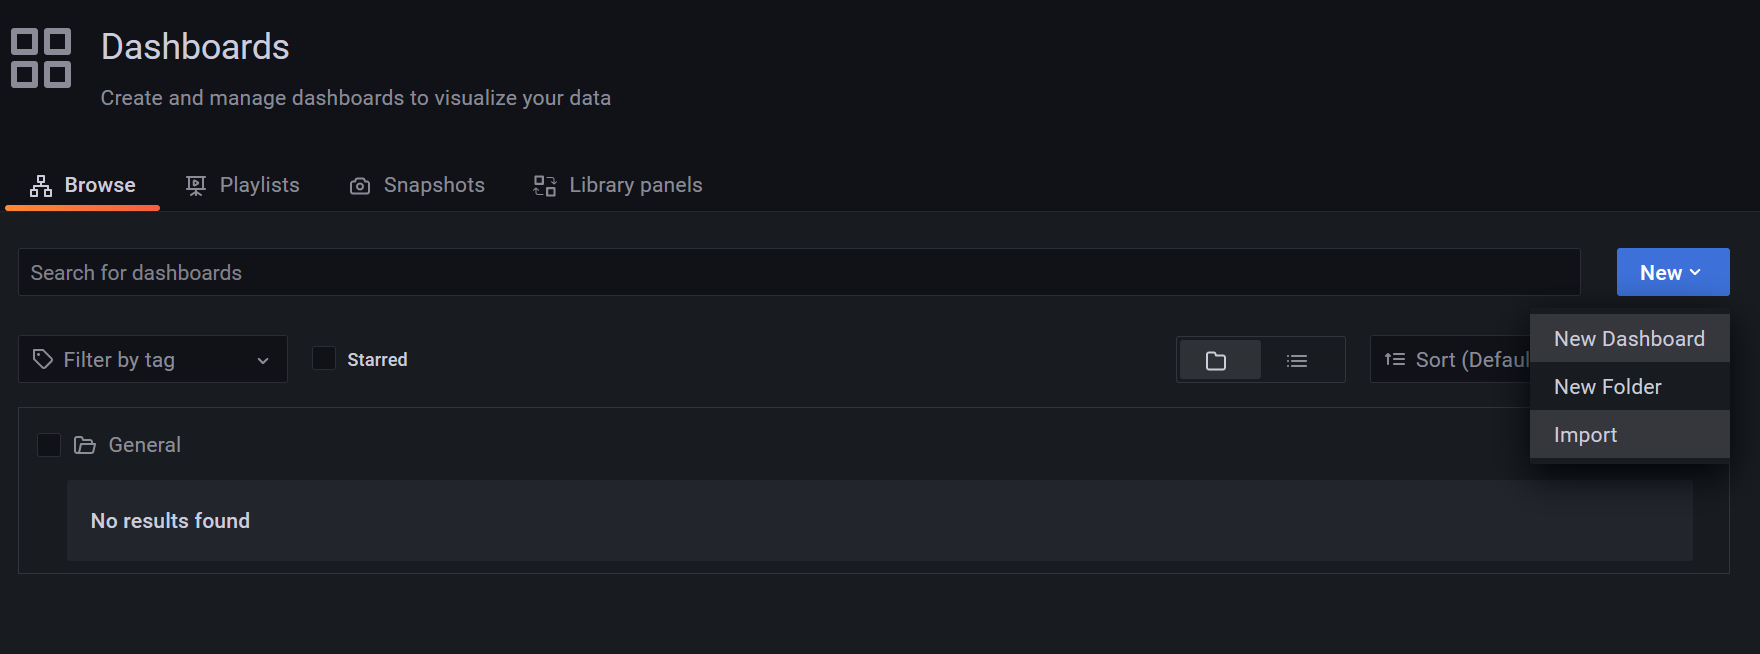
- Click Dashboards > Browse
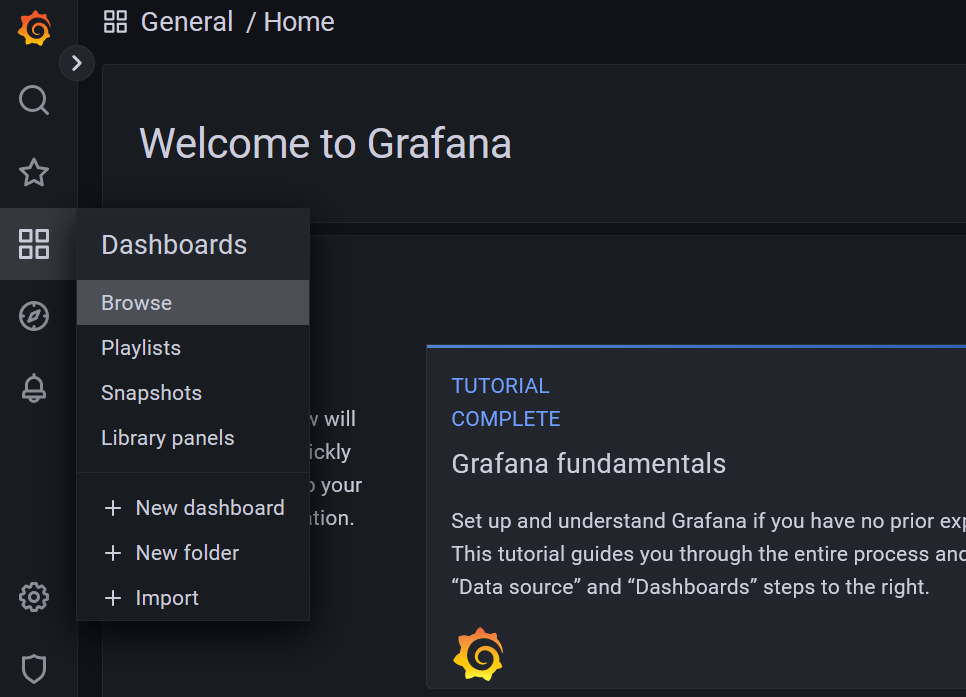
- Click New > Import
- Navigate to your local clone of this repository, then go to the 'frontend/grafana/dashboards' folder and select one of the dashboard '.json' files.
- This process should be repeated for all dashboard files in that folder.
- You should now have all of the required dashboards available in your server.
The logger is a python class with the following class methods that should be used in the following order:
Connect- Initialize a connection with the System.NewExperiment- Declares that the following messages will be send from a new experiment.- Use
Logger.log(<proto message containing the data of type Message>) EndExperiment- Declares that the experiment has ended.
In order to backup the database from the docker container:
*. pg_dump -U postgres -Fc -f <file_name>.bak postgres
To backup the database from the host machine:
*. pg_dump -h localhost -p 5432 -U postgres -Fc -f <file_name>.bak postgres
- Before Loading the backup file, run the following command (this command will delete all the data on the database, so if you need it it's a good time to backup:
python3 server/db/init_db.py -d
Assuming you have a .bak backup file, this are the steps to do in order to load and use the data in the file:
- Connect to the database,
psql -h localhost -p 5432 -U postgres -d postgres. - Run timescaledb_pre_restore to put your database in the right state for restoring:
SELECT timescaledb_pre_restore(); - Restore the database:
\! pg_restore -Fc -d postgres <path_to_file>.bak - Run timescaledb_post_restore to return your database to normal operations:
SELECT timescaledb_post_restore(); - Optinal - Reindex your database to improve query performance:
REINDEX DATABASE \<DB\>;
python3 server/db/init_db.py -c