A platform that connects real-world supply and demand, enabling community members to efficiently share resources and services through ride-sharing economy principles.
Authors: 張瑞芳
Version: 2.0.0
Created: January 2025
CloudTribe is an innovative convenience economy platform designed to connect supply and demand in the real world, allowing community members to efficiently share resources and services.
- Convenience Economy: Maximize resource utilization efficiency by leveraging existing travel routes
- Community Mutual Aid: Build a trust-based mutual assistance network
- Sustainable Development: Reduce unnecessary transportation and resource waste
- Digitalization: Transform traditional word-of-mouth into a digital platform
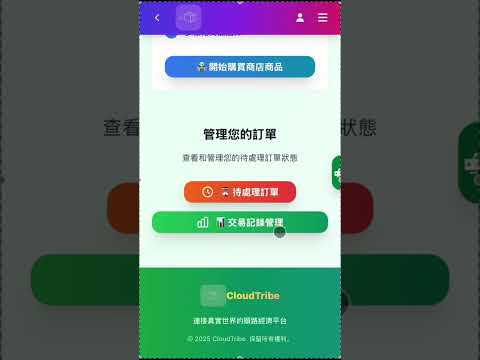
- Multi-role Support: Seamlessly switch between Buyer, Seller, and Driver roles
- Smart Matching: Intelligent recommendation system based on location and needs
- Real-time Communication: Integrated LINE Bot for instant notifications
- Route Optimization: Integrated Google Maps API for optimal delivery routes
- Role Selection & Matching: Users can choose Buyer, Seller, or Driver roles with intelligent order matching
- Order Management: Dynamic form interface supporting order creation, modification, and deletion
- Route Planning: Integrated Google Maps API providing optimal delivery routes and time estimates
- Order Tracking: Users can track order history and current status
- Real-time Notifications: LINE Bot integration for order status updates and important notifications
- Payment Integration: Support for multiple payment methods ensuring secure transactions
- Framework: Next.js 15.3.3 + React 18
- Language: TypeScript
- Styling: Tailwind CSS
- UI Components: Shadcn/ui (Radix UI)
- State Management: React Hooks + Context API
- Maps: Google Maps API, @react-google-maps/api
- Framework: Python 3.11 + FastAPI
- Database: PostgreSQL 15
- Database Connection: psycopg2-binary (connection pooling)
- Authentication: JWT + OAuth2
- Task Scheduling: schedule (Python)
- Maps Service: Google Maps API (JavaScript, Places, Geocoding, Directions)
- Real-time Communication: LINE Bot API (Messaging API)
- Image Storage: ImgBB API
- Cloud Deployment: AWS EC2 (t2.micro) + AWS RDS
- Version Control: Git
- Package Management: npm (frontend) + pip (backend)
- Process Management: PM2
- Environment Variables: python-dotenv

- Node.js 18+ and npm
- Python 3.11+
- PostgreSQL 15+
- pgAdmin4 (optional, for database management)
-
Clone the repository
git clone <repository-url>
cd cloudtribe-2.0
-
Set up Backend
cd backend pip install -r requirements.txt -
Set up Frontend
cd ../client npm install -
Configure Environment Variables (see detailed setup below)
-
Start Development Servers
# Terminal 1: Backend (runs on port 8001)
cd backend
python main.py

# Terminal 2: Frontend (runs on port 3000)
cd client
npm run dev
-
Open your browser
- Frontend: http://localhost:3000
- Backend API: http://localhost:8001
- API Docs: http://localhost:8001/docs
-
Create environment file
- Navigate to
client/directory - Create
.env.localfile (copy from.env.local_templateif it exists)
- Navigate to
-
Get Google Maps API Key
- Go to Google Cloud Console
- Create a new project or select existing one
- Enable the following APIs:
- Maps JavaScript API
- Places API
- Geocoding API
- Directions API
- Go to Credentials → Create API Key
- Go to Map Management → Get Map ID
-
Configure
.env.localNEXT_PUBLIC_GOOGLE_MAPS_API_KEY=your_api_key_here NEXT_PUBLIC_MAP_ID=your_map_id_here
-
Install PostgreSQL
- Download and install PostgreSQL
- Install pgAdmin4 (optional, for GUI)
-
Create Database
CREATE DATABASE shopping;
-
Configure Database Connection
- Navigate to
backend/directory - Create
.envfile (copy from.env_templateif it exists) - Add your database connection string:
DATABASE_URL=postgresql://username:password@localhost:5432/shopping
Connection String Format:
postgresql://- Database typeusername- Your PostgreSQL username (default:postgres)password- Your PostgreSQL passwordlocalhost- Database host (uselocalhostfor local development)5432- PostgreSQL port (default: 5432)shopping- Database name
- Navigate to
-
Initialize Database Schema
- Open pgAdmin4 or use psql command line
- Connect to your database
- Run the SQL script:
backend/database/createtable.sql - Run additional migration scripts if needed:
backend/database/createIndex.sql(for indexes)backend/database/add_email_column.sql(if needed)backend/database/add_selected_options_column.sql(if needed)
-
Create LINE Bot Account
- Go to LINE Developers Console
- Create a new Messaging API Channel
- In Basic Settings tab, copy the
Channel secret - In Messaging API tab, generate and copy the
Channel access token
-
Configure LINE Bot in
.envLINE_BOT_TOKEN=your_channel_access_token LINE_BOT_SECRET=your_channel_secret
-
Set Webhook URL (for production)
- In LINE Developers Console, set webhook URL to:
https://your-domain.com/callback - For local development, use ngrok or similar tunneling service
- In LINE Developers Console, set webhook URL to:
-
Get ImgBB API Key
- Go to ImgBB API
- Sign up and get your API key
-
Configure in
.envIMGBB_API_KEY=your_imgbb_api_key
Create backend/.env with all required variables:
# Database
DATABASE_URL=postgresql://postgres:password@localhost:5432/shopping

# LINE Bot
LINE_BOT_TOKEN=your_line_bot_token
LINE_BOT_SECRET=your_line_bot_secret

# ImgBB (Optional)
IMGBB_API_KEY=your_imgbb_api_keycloudtribe-2.0/
├── client/ # Frontend (Next.js + React + TypeScript)
│ ├── app/ # Next.js app directory (pages/routes)
│ │ ├── page.tsx # Home page
│ │ ├── login/ # Login page
│ │ ├── buyer_options/ # Buyer interface
│ │ ├── seller_options/ # Seller interface
│ │ ├── driver/ # Driver interface
│ │ └── tribe_resident/ # Tribe resident features
│ ├── components/ # Reusable React components
│ │ ├── ui/ # Shadcn/ui components
│ │ ├── consumer/ # Consumer components
│ │ ├── driver/ # Driver components
│ │ └── tribe_resident/ # Tribe resident components
│ ├── services/ # API service functions
│ ├── interfaces/ # TypeScript type definitions
│ ├── public/ # Static assets (images, etc.)
│ └── package.json # Frontend dependencies
│
├── backend/ # Backend (Python + FastAPI)
│ ├── routers/ # API route handlers
│ │ ├── users.py # User management
│ │ ├── orders.py # Order management
│ │ ├── drivers.py # Driver operations
│ │ ├── seller.py # Seller operations
│ │ ├── consumer.py # Consumer operations
│ │ └── email_otp.py # Email OTP verification
│ ├── models/ # Data models
│ ├── handlers/ # Business logic handlers
│ │ ├── send_message.py # LINE Bot message handling
│ │ └── customer_service.py # Customer service
│ ├── database/ # Database scripts
│ │ ├── createtable.sql # Initial schema
│ │ ├── createIndex.sql # Database indexes
│ │ └── *.sql # Migration scripts
│ ├── database.py # Database connection pool
│ ├── main.py # FastAPI application entry point
│ ├── scheduler.py # Background task scheduler
│ └── requirements.txt # Python dependencies
│
└── README.md # This file
cd client

# Install dependencies
npm install

# Start development server (port 3000)
npm run dev

# Build for production
npm run build

# Start production server
npm start

# Run linter
npm run lintcd backend
# Install dependencies
pip install -r requirements.txt
# Run development server (port 8001)
python main.py
# Or using uvicorn directly
uvicorn backend.main:app --host 0.0.0.0 --port 8001 --reloadThe backend API runs on http://localhost:8001 with the following main routes:
/api/users- User management (login, registration, profile)/api/orders- Order operations/api/drivers- Driver operations/api/seller- Seller operations/api/consumer- Consumer operations/api/history- Order history management/api/otp- Email OTP verification/callback- LINE Bot webhook endpoint/health- Health check endpoint/docs- Interactive API documentation (Swagger UI)
The project is deployed on:
- Frontend: AWS EC2 (t2.micro)
- Backend: AWS EC2 (t2.micro)
- Database: AWS RDS (PostgreSQL)
-
Build Frontend
cd client npm run build -
Set Production Environment Variables
- Configure production
.envfiles - Set up production database connection
- Configure production API keys
- Configure production
-
Start Services
- Use PM2 or systemd for process management
- Configure nginx as reverse proxy (optional)
- Set up SSL certificates (for HTTPS)
-
Configure LINE Bot Webhook
- Update webhook URL to production domain
- Verify webhook signature
See DEPLOYMENT_GUIDE.md for detailed deployment instructions.
For issues, questions, or contributions, please email to ayethihan01@gmail.com
Note: Make sure to never commit .env files or API keys to version control. Always use .env.example or .env.template files as templates.